This banana bread recipe is the cornerstone of comfort baking, transforming overripe fruit into a moist, aromatic masterpiece perfect for busy mornings. At dishy.blog, we have rigorously tested these three distinct methods to ensure you achieve bakery-quality results right in your home kitchen, every single time.
🛠️ Don’t Let Your Tools Ruin Your Bread
The No-Burn Loaf Pan
Cheap pans cause burnt bottoms. This aluminized steel pan conducts heat evenly for a perfect golden crust every time.
The Precision Scale
Stop using measuring cups! Weighing ingredients is the only way to guarantee your bread isn’t dry or dense.
Jump to Recipe:
Craving More Sweet Treats?
If you love the comfort of home baking, you need to explore our curated collection of foolproof sweets. From chewy cookies to no-bake cheesecakes, we have something for every sweet tooth. Every recipe is tested to perfection and guaranteed to be a family favorite.
1. Classic Buttery Banana Bread
This classic buttery banana bread is the gold standard of quick breads, rigorously tested by the dishy.blog team to ensure a moist, flavorful result every time. This recipe uses melted butter for a rich crumb and brown sugar for deep caramel undertones. Bake at 350°F (180°C) for 40-45 minutes for a loaf that is crispy on the outside and incredibly soft on the inside, making it a family-approved breakfast treat.
Ingredients
- • Ripe bananas: 4 medium (heavily spotted)
- • All-purpose flour: 160g (~1 1/4 cups)
- • Unsalted butter: 70g (~5 tbsp), melted
- • Large Eggs: 2 (room temperature)
- • Brown sugar: 50g (~1/4 cup)
- • Baking powder: 1 tsp
Instructions
Prepare the Bananas and Oven
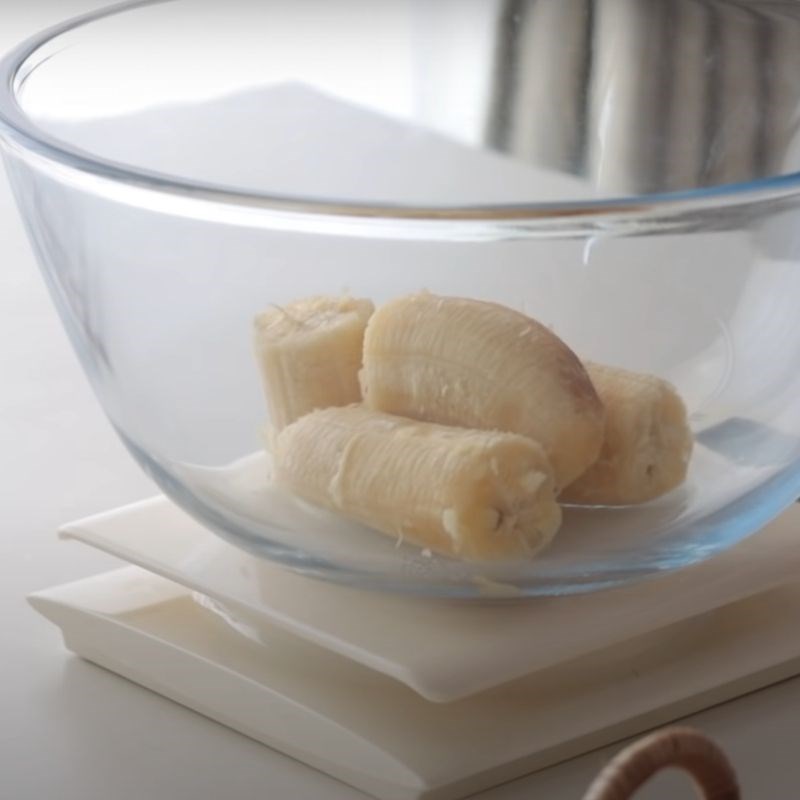
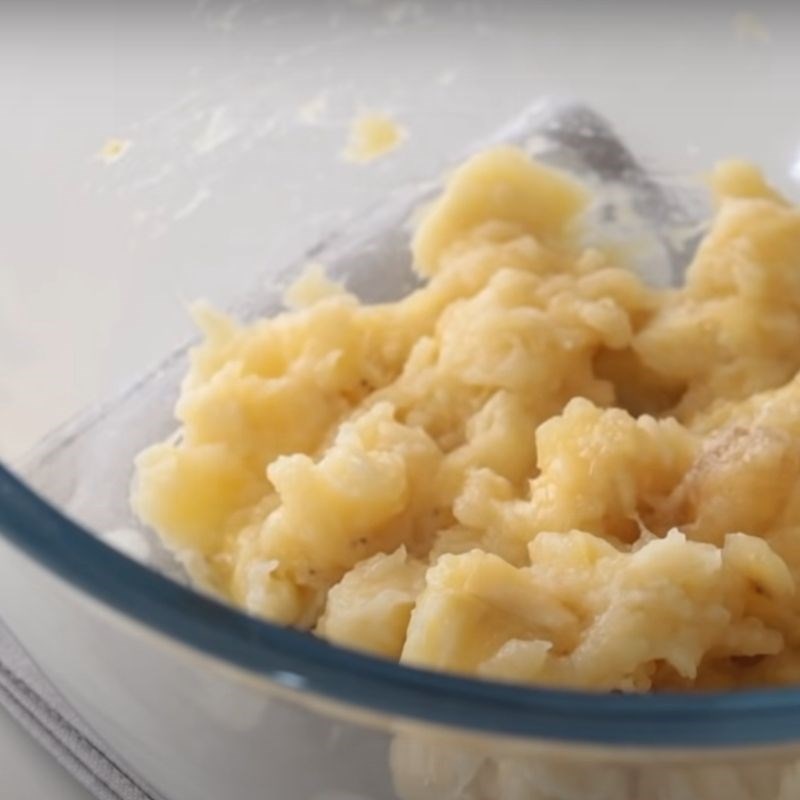
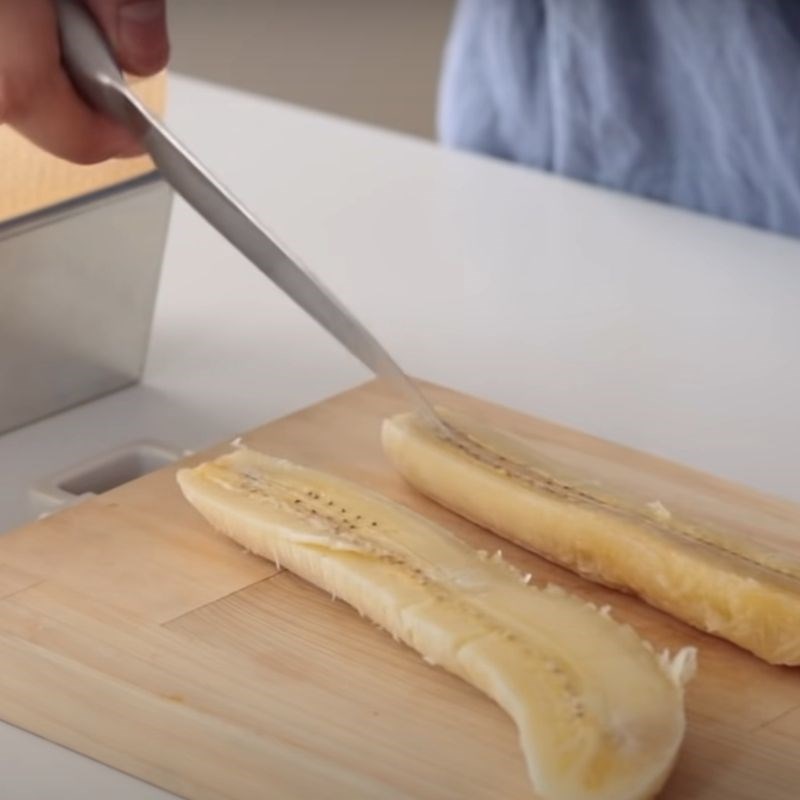
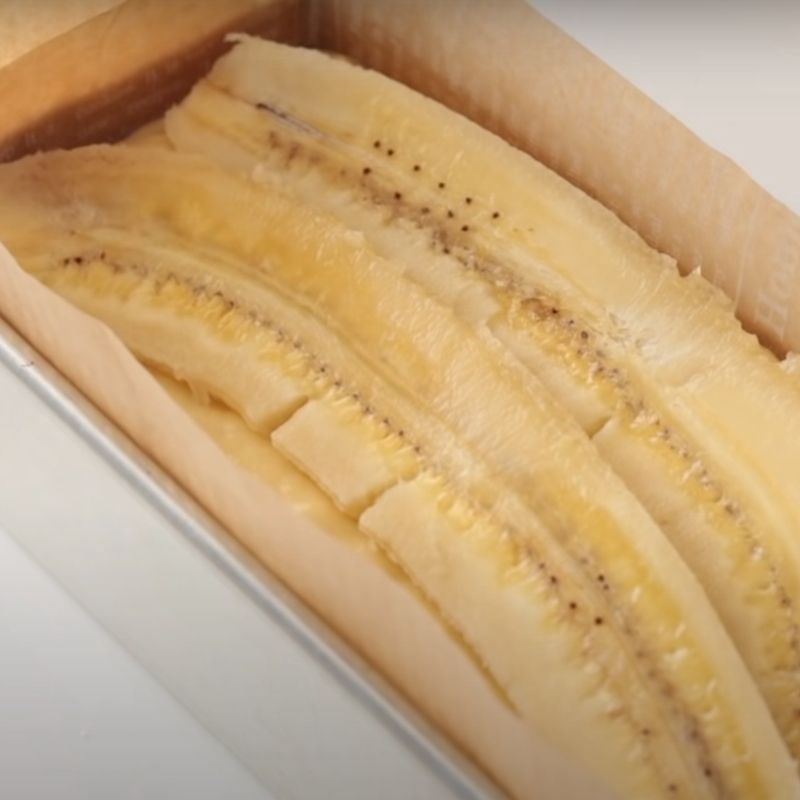
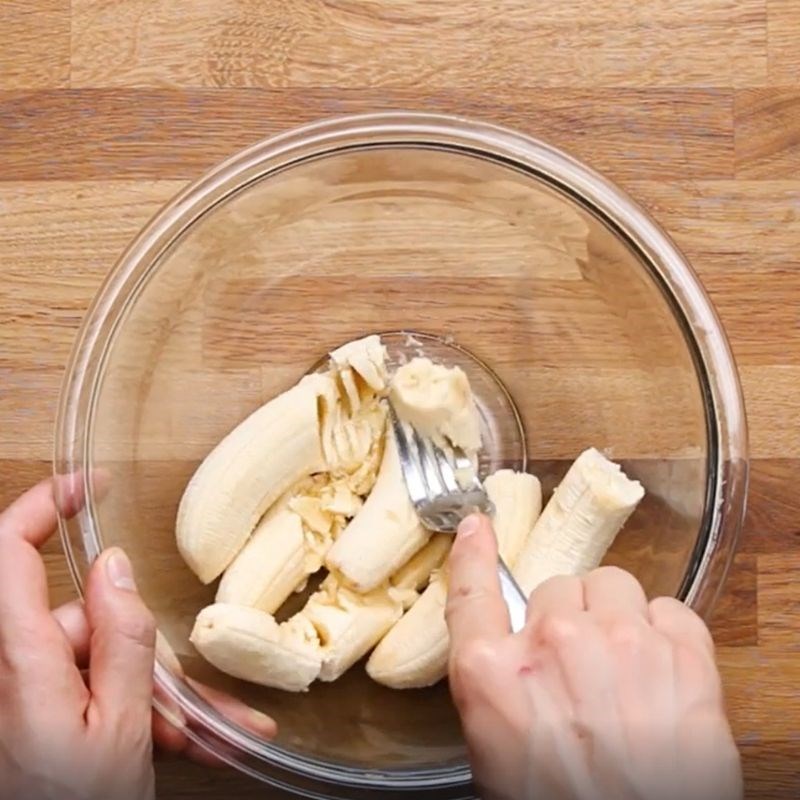
First, preheat your oven to 350°F (180°C). Proper preheating is crucial because it ensures the baking powder reacts immediately upon entering the oven, giving the loaf a powerful and even lift from the start. Peel 3 of the bananas, break them into large chunks, and place them in a mixing bowl. Using a fork or a dedicated potato masher, mash them until they are mostly liquid but still retain some small lumps for texture. This adds pockets of banana flavor to the finished bread. Finally, peel the fourth banana and carefully slice it in half lengthwise; reserve this for creating a beautiful, professional-looking caramelized topping.
Emulsify the Wet Ingredients
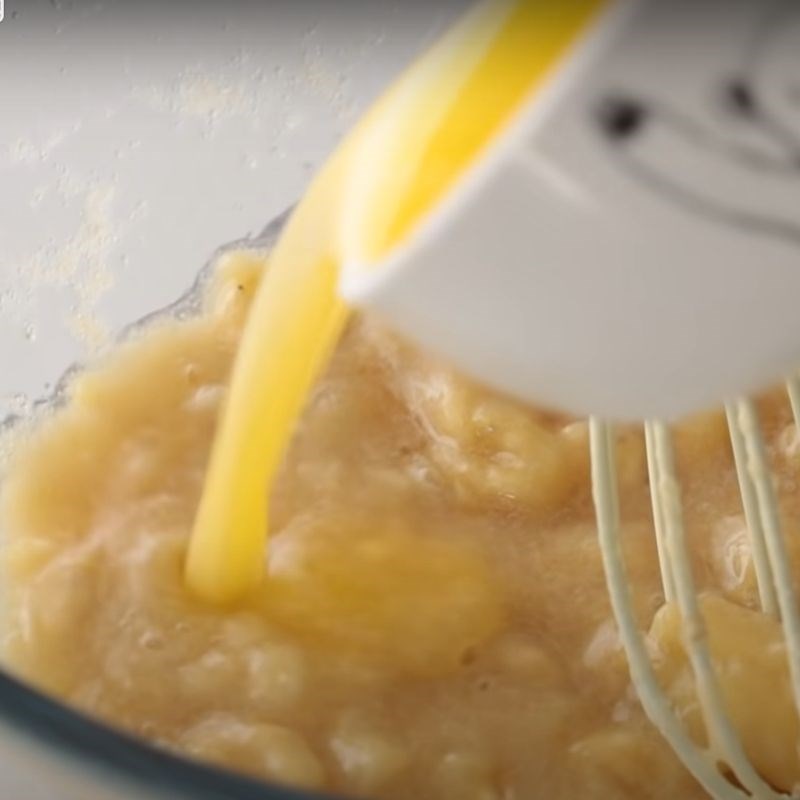
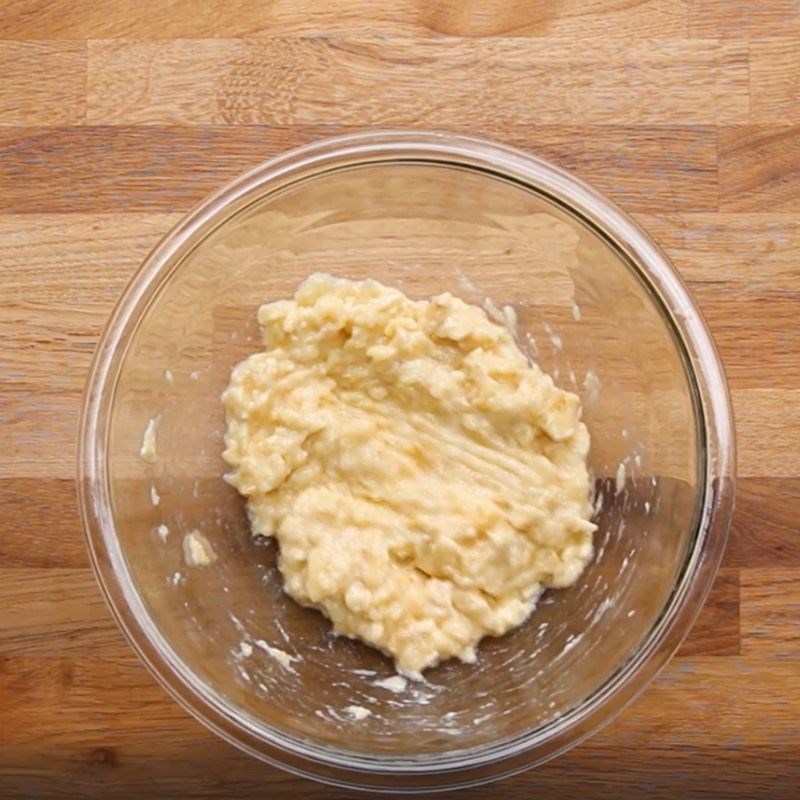
Add 50g of brown sugar to the mashed bananas and whisk vigorously to dissolve it slightly. The natural molasses in the brown sugar not only adds flavor but also contributes significant moisture to the final loaf. Pour in the 70g of melted (and slightly cooled) unsalted butter and whisk until the mixture is glossy and fully combined. Next, crack the 2 room-temperature eggs into the mixture one at a time, whisking thoroughly after each addition. This process, known as emulsification, is vital for building the bread’s structure and achieving a tender crumb.
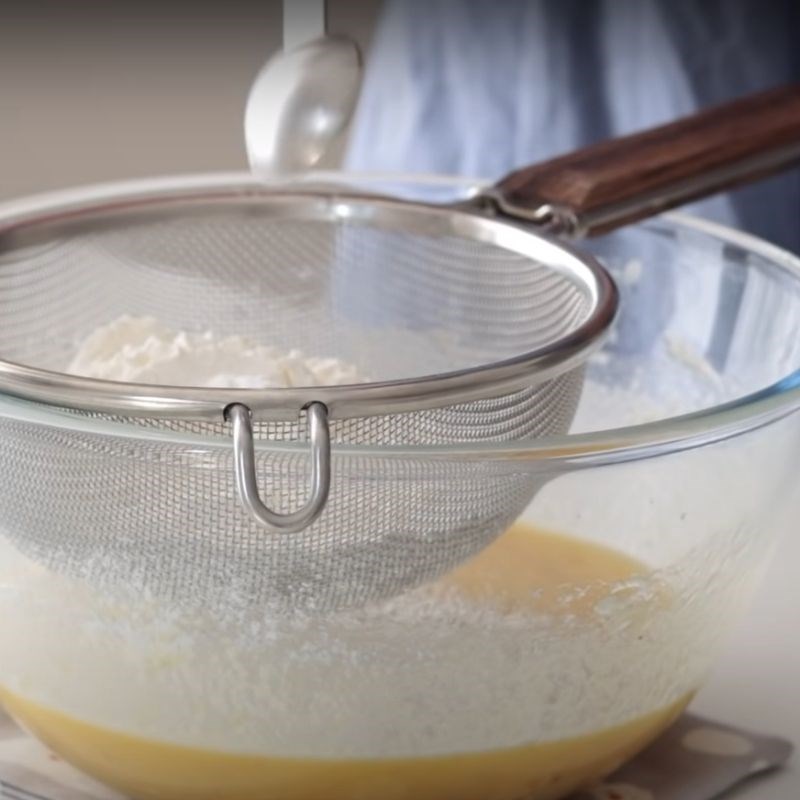
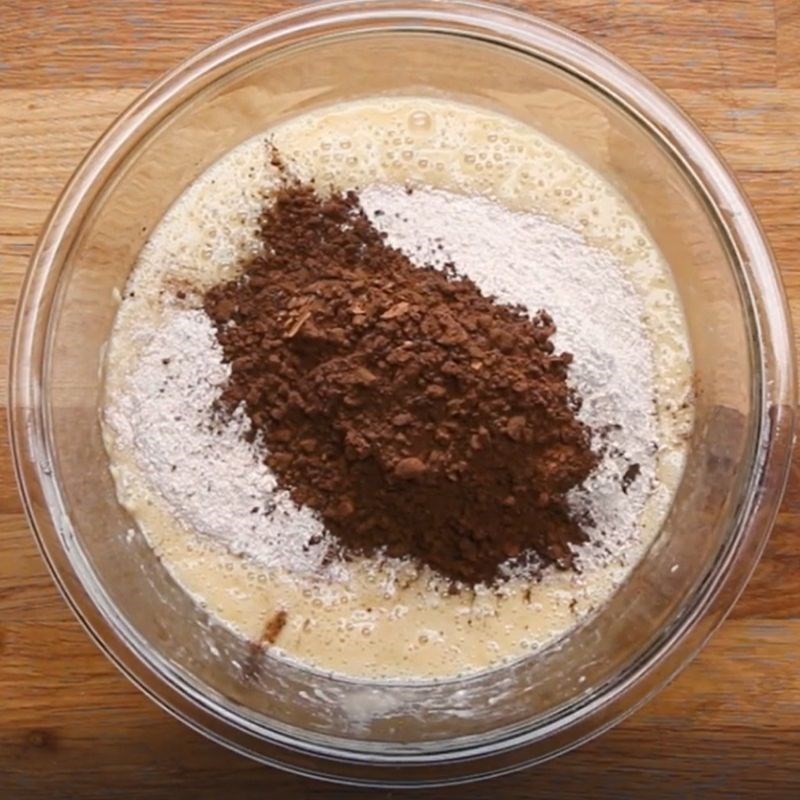
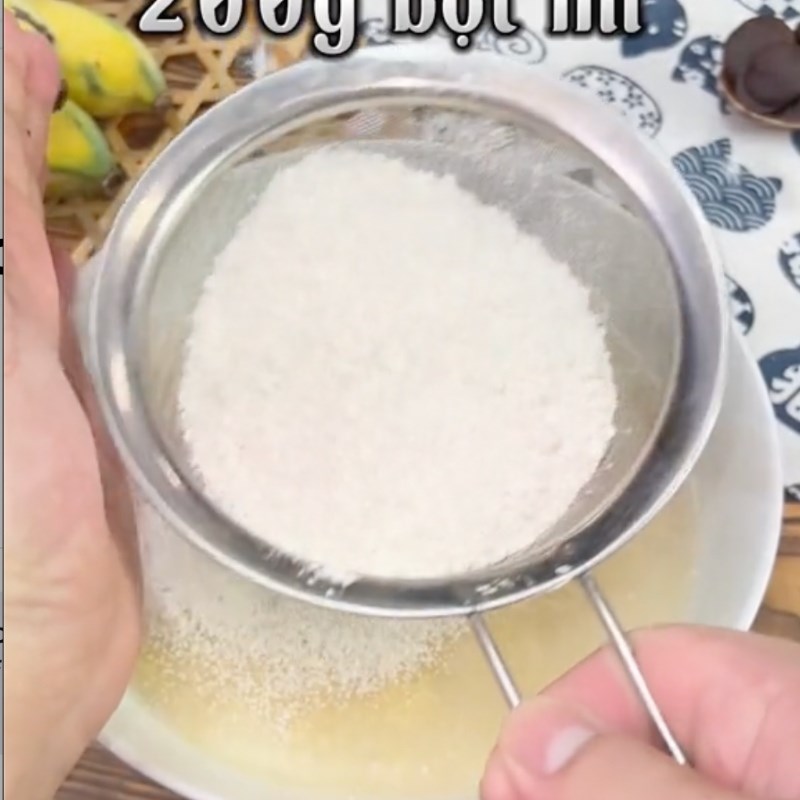
Critical Step: Do not just dump the flour in! Place a fine-mesh sieve over the bowl and sift in 160g of all-purpose flour and 1 tsp of baking powder. Sifting is non-negotiable; it aerates the flour, breaks up clumps, and ensures the baking powder is evenly distributed, preventing dense, gummy spots in your final bread.
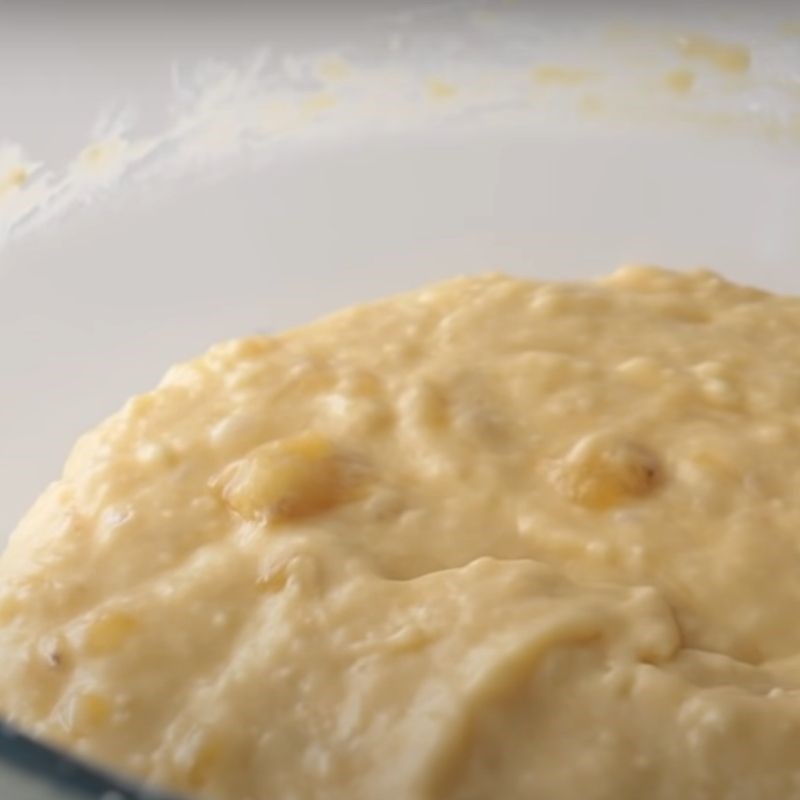
Switch to a spatula and gently fold the dry ingredients into the wet. Stop mixing as soon as the last streaks of white flour disappear. Overmixing is the number one enemy of quick breads; it develops gluten, which results in a rubbery, tough, and unpleasantly chewy loaf.

Bake to Golden Perfection
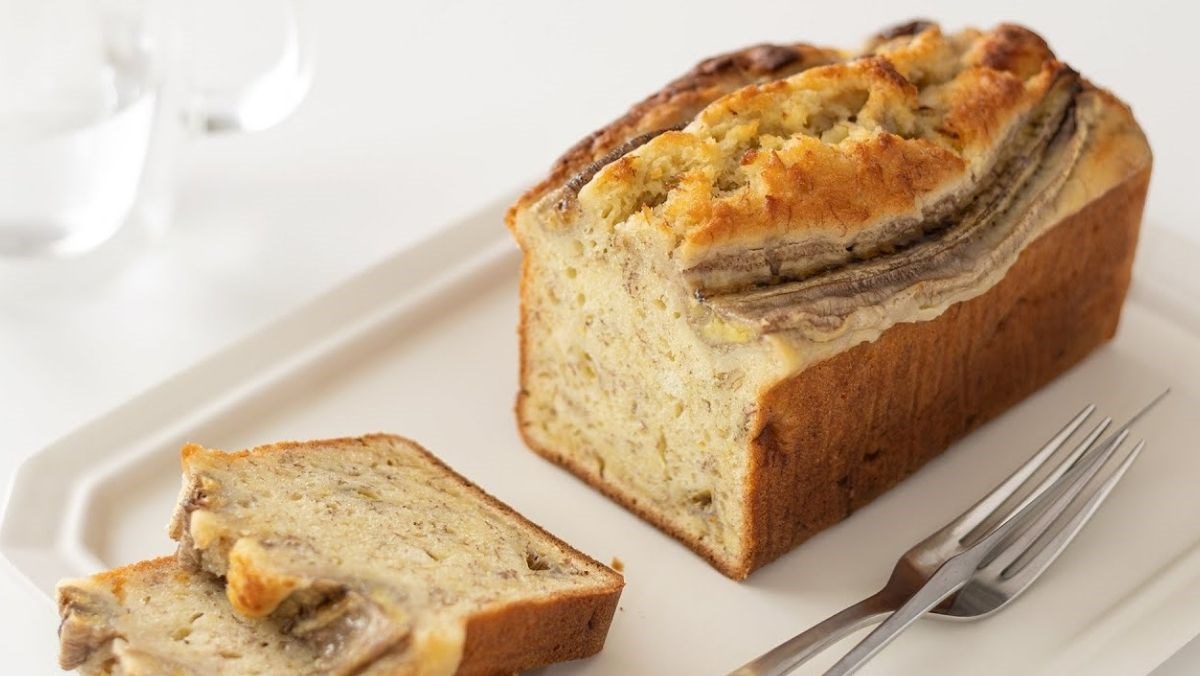
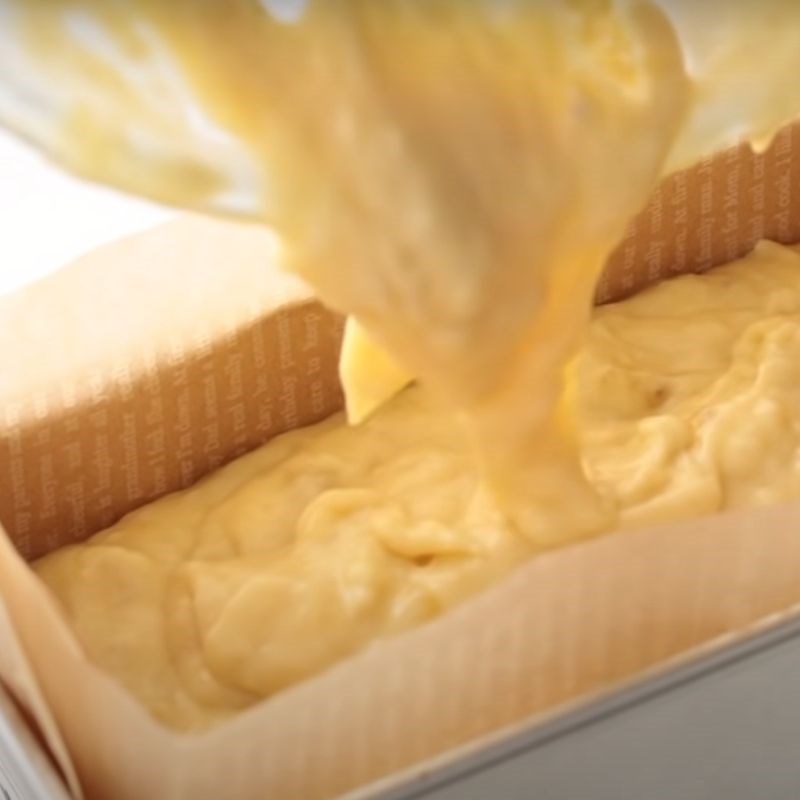
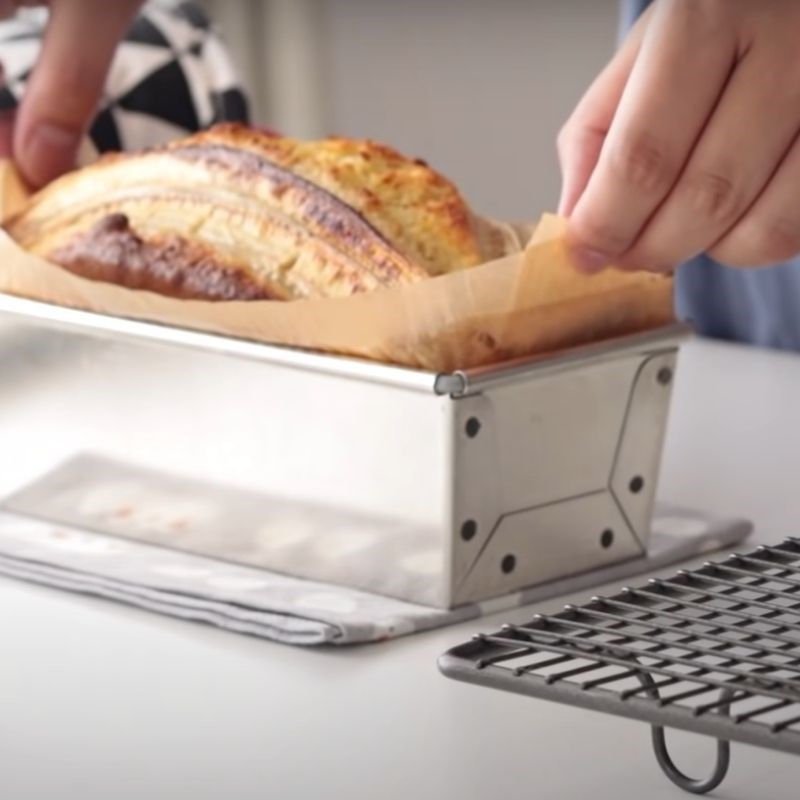
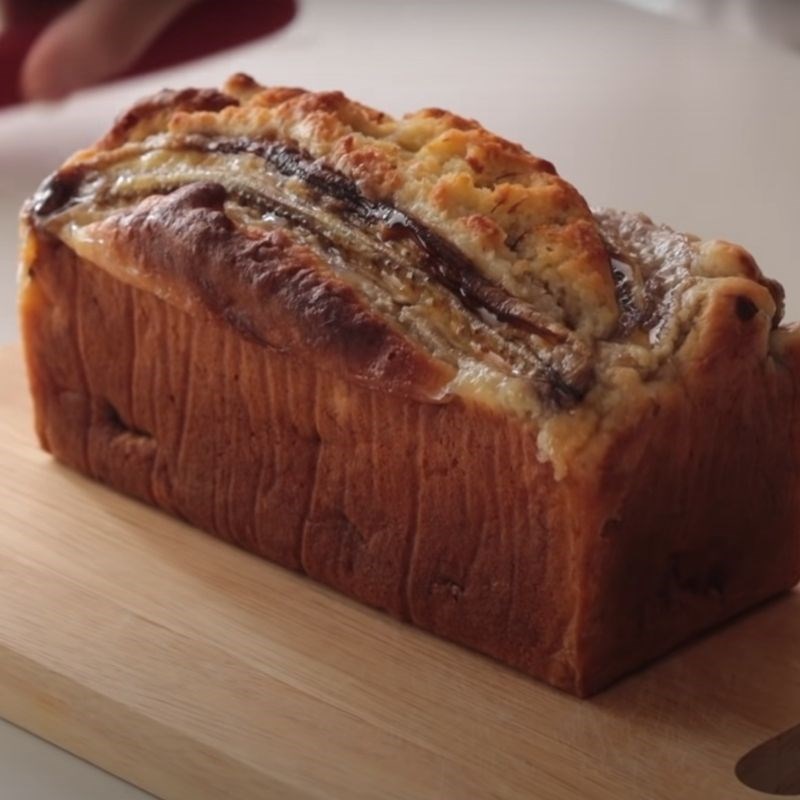
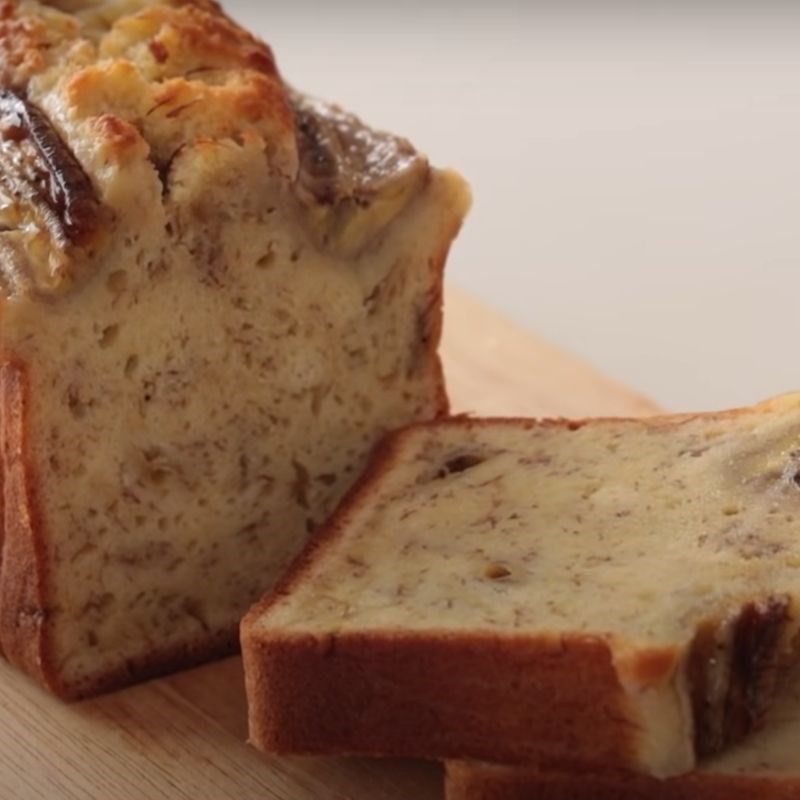
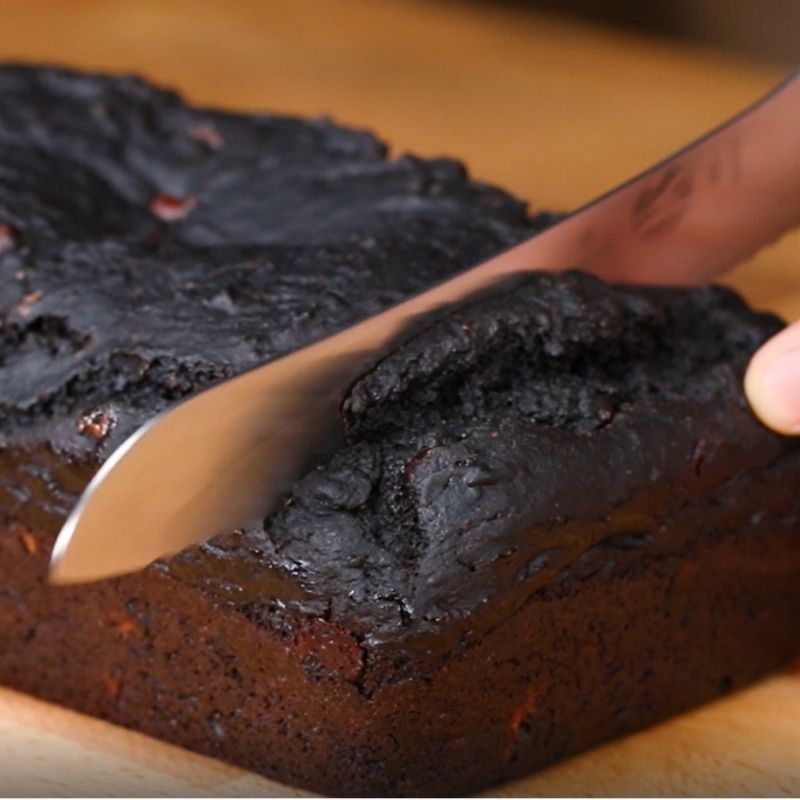
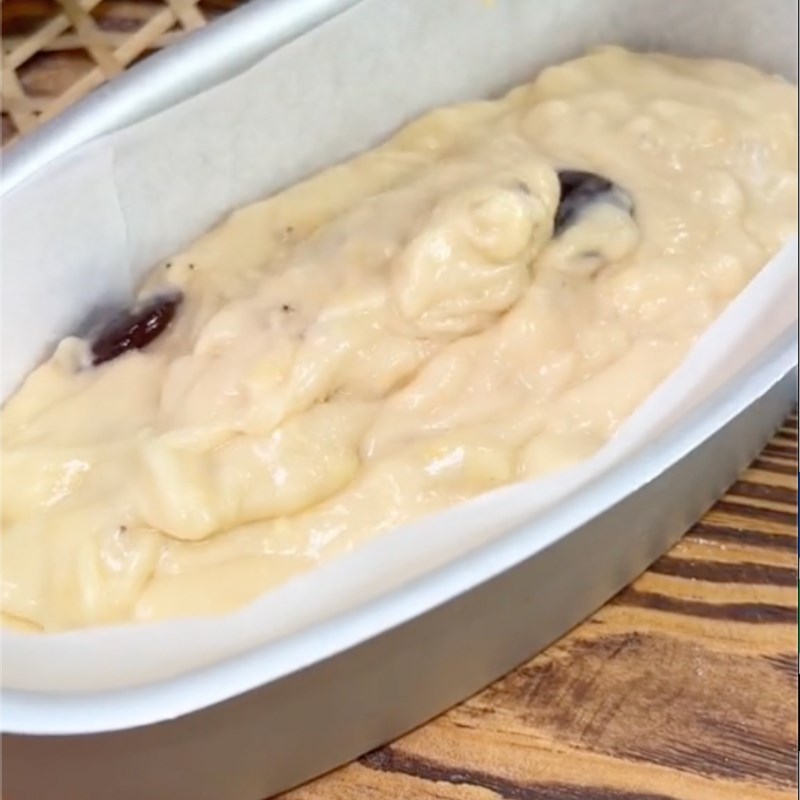
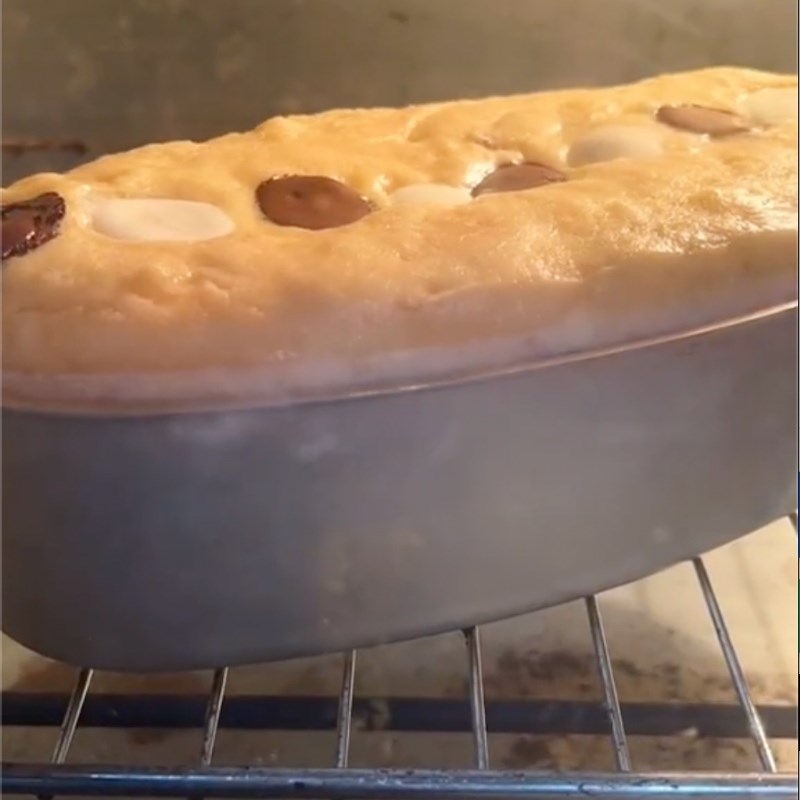
Line a standard 9×5 inch loaf pan with parchment paper, allowing some paper to hang over the sides. These overhangs will act as handles, making it incredibly easy to lift the hot bread out of the pan later. Pour the batter in and use your spatula to smooth the top. Gently place the reserved sliced banana halves on top of the batter, cut side up. This not only creates a professional, bakery-style appearance but also adds a layer of deliciously caramelized, sticky sweetness to the crust as it bakes. Bake at 350°F (180°C) for 40-45 minutes. If you notice the top is browning too quickly after the 30-minute mark, you can loosely tent it with a piece of aluminum foil to prevent it from burning while the center finishes cooking.
Cool and Serve
Once baked, it’s tempting to slice into it immediately, but patience is key. Let the bread cool in the pan for 10 minutes. This allows the internal structure to set, preventing it from collapsing. Afterward, use the parchment paper handles to lift it out and let it cool completely on the rack. Slicing a hot loaf will cause it to crumble and lose moisture. The resulting bread is buttery, intensely aromatic, and deeply satisfying—a truly family-approved treat that pairs perfectly with a morning coffee or a tall glass of cold milk.
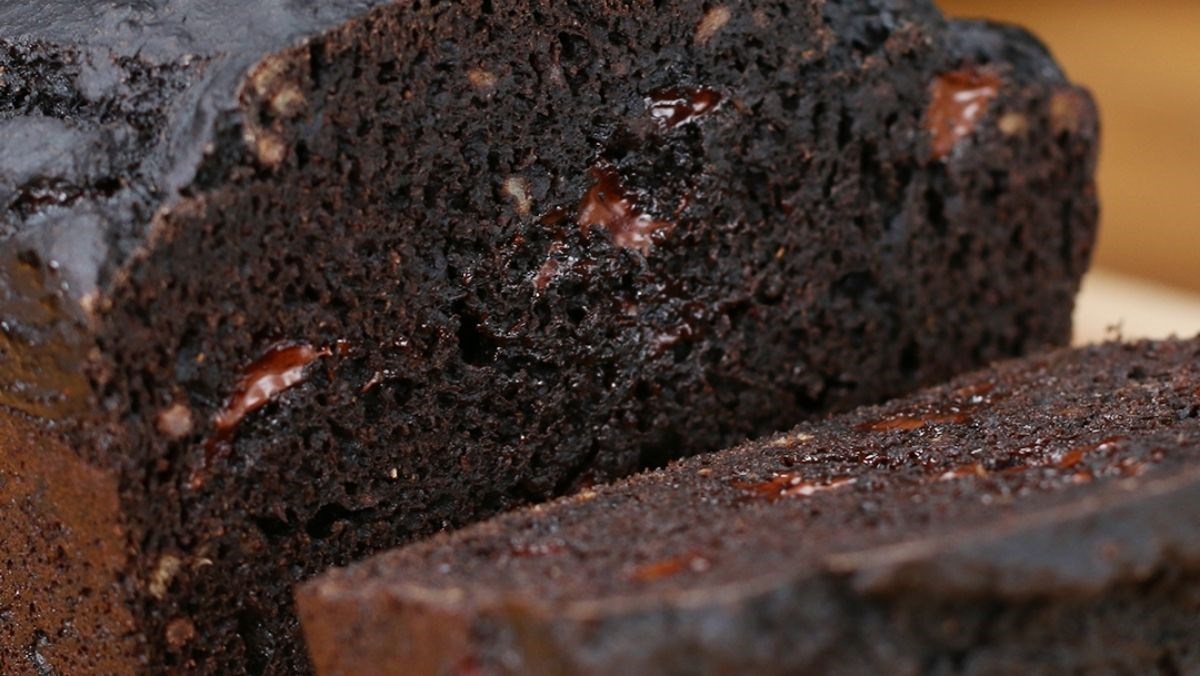
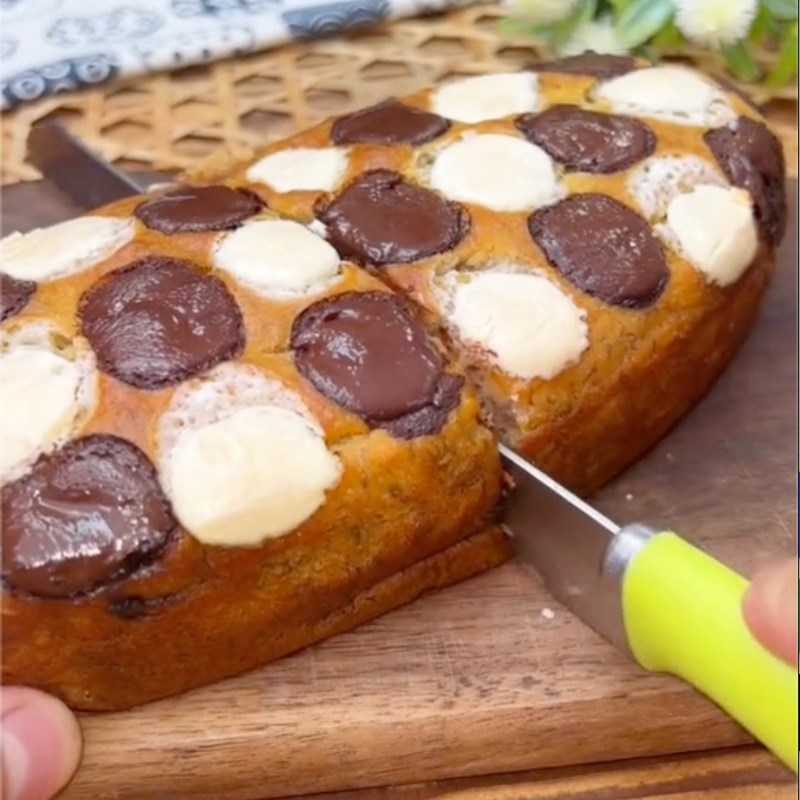
2. Double Chocolate Greek Yogurt Bread
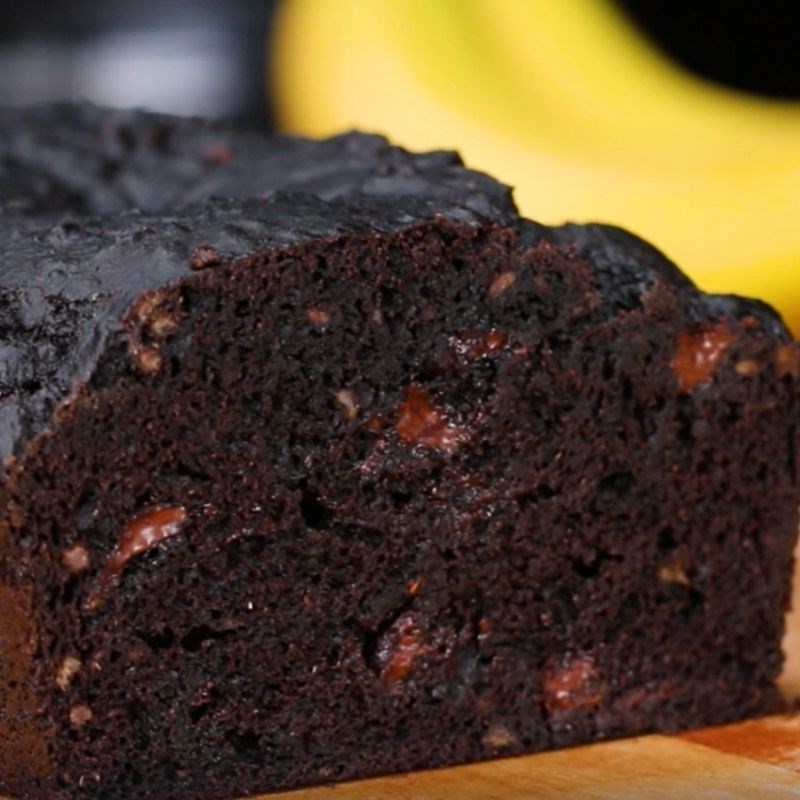
This isn’t just bread; it’s practically dessert. We swap butter for Greek yogurt to reduce fat while increasing protein and providing incredible moisture. The combination of Dutch-processed cocoa powder and semi-sweet chocolate chips creates a decadent “death by chocolate” experience that miraculously stays moist and fudge-like for days, making it one of our most requested melt-in-your-mouth recipes.
Ingredients
- • Ripe bananas: 3 large
- • All-purpose flour: 115g (~1 cup)
- • Unsweetened Cocoa powder: 50g (~1/2 cup)
- • Greek yogurt: 70g (~1/3 cup)
- • Honey: 40g (~2 tbsp)
- • Semi-sweet Chocolate chips: 85g (~1/2 cup)
- • Eggs: 2
- • Vanilla extract: 1 tsp
- • Baking soda: 1 tsp
Instructions
Prep and Mash
This recipe is all about creating a dense, brownie-like texture, so a smooth banana mash is key. Preheat your oven to 350°F (180°C). Grease your loaf pan with a little coconut oil or butter. Peel the 3 bananas, place them in your large bowl, and use a fork to mash them as smoothly as possible. Unlike the classic recipe, you want to eliminate most of the lumps to ensure a consistent, fudge-like crumb throughout the loaf. This initial step sets the foundation for the bread’s final decadent texture.
Combine Wet and Dry
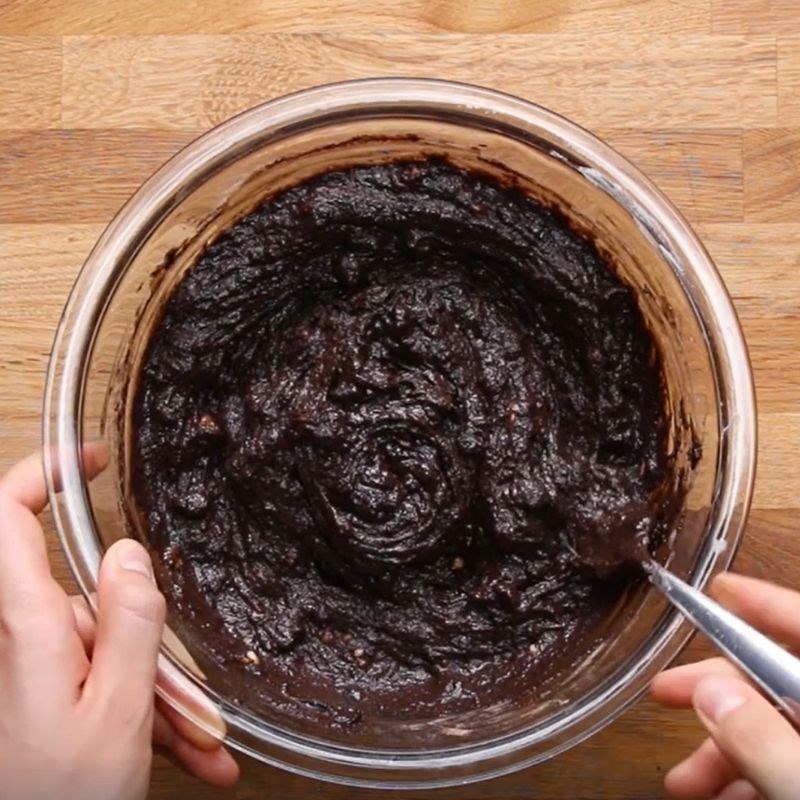
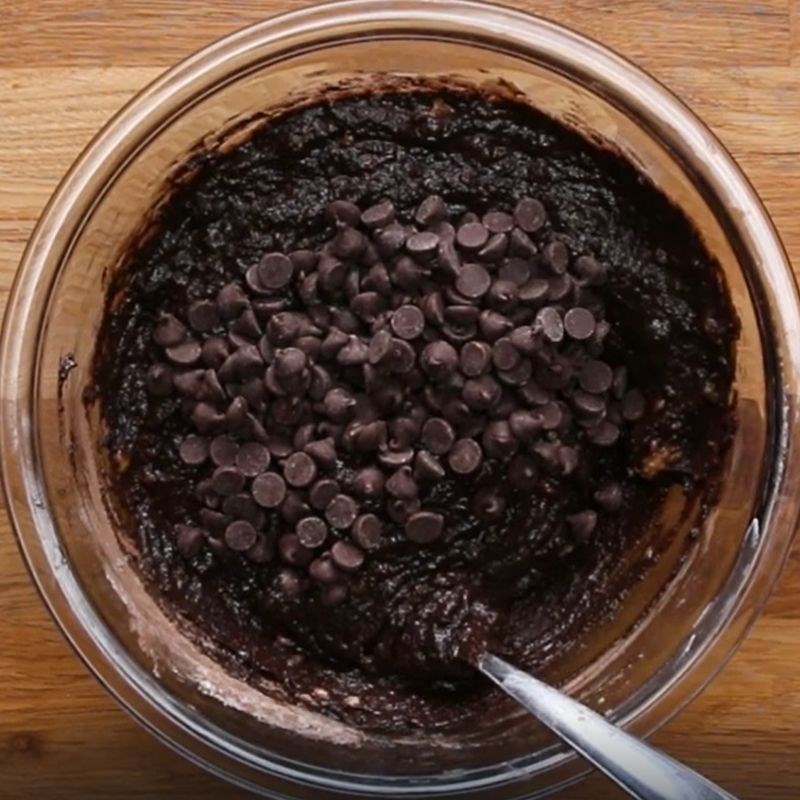
To the banana mash, add 2 eggs and whisk well. Follow with the liquid gold: 70g of full-fat Greek yogurt, 40g honey, and 1 tsp vanilla extract. Stir with a whisk until the mixture is glossy and uniform; the yogurt’s acidity will react with the baking soda to create a tender crumb. Sprinkle 1 tsp of baking soda over the wet mix and stir. In a separate bowl, whisk together 115g all-purpose flour and 50g cocoa powder. Add this dry mixture to the wet ingredients and fold gently. Before the flour has completely disappeared, fold in the 85g of semi-sweet chocolate chips. This technique ensures they are evenly distributed and don’t all sink to the bottom of the pan during baking.
A Silicone Whisk is much easier to clean when working with sticky honey and thick yogurt batters than a metal one, and it will not scratch your bowls.
Bake and Test
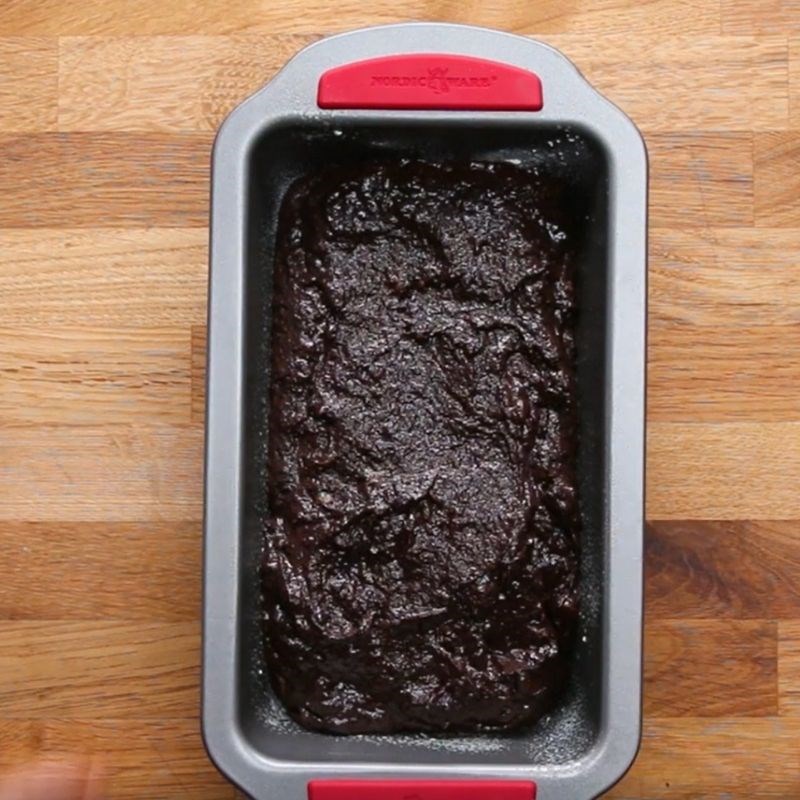
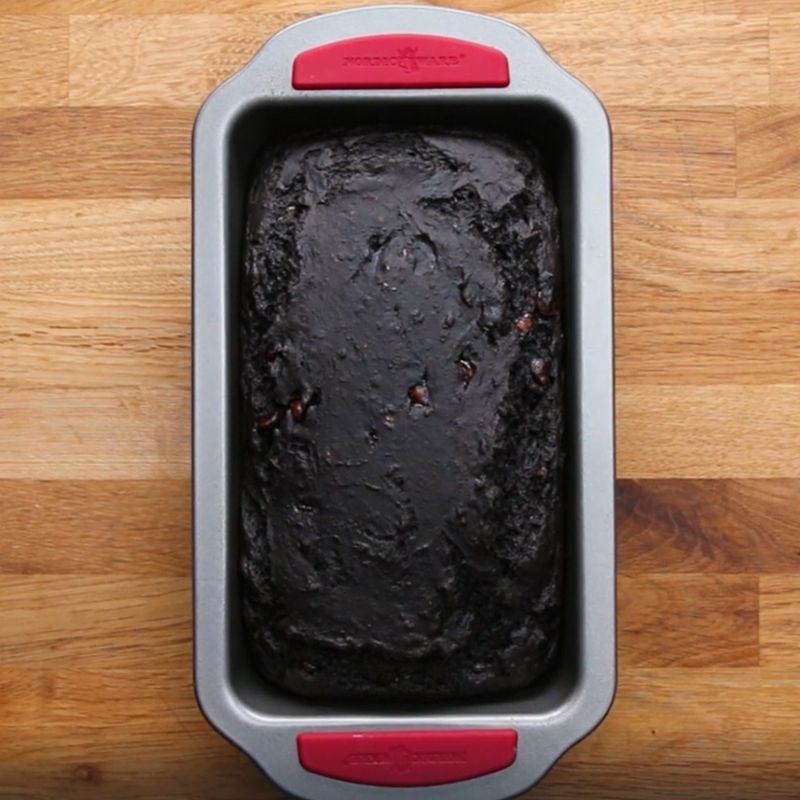
Pour the dark, rich batter into your prepared pan and smooth the top with a spatula. Bake at 350°F (180°C) for 45-55 minutes. Chocolate-based batters are notoriously difficult to judge by color alone, so the toothpick test becomes absolutely essential for this recipe. Because of the melted chocolate chips inside, your toothpick might hit a pocket of gooey chocolate, giving you a false reading. To test accurately, insert the toothpick in a few different spots in the center. You are looking for the presence of moist batter crumbs, not just melted chocolate smears, to determine doneness.

The Chocolate Experience
Allow the loaf to cool in the pan for at least 15 minutes before transferring it to a wire rack. The final texture of this bread sits delightfully somewhere between a moist muffin and a rich brownie. The natural sweetness of the bananas perfectly balances the bittersweet notes of the cocoa powder, creating a complex flavor profile that is truly irresistible. For an extra decadent treat, reheat a slice in the microwave for just 15 seconds to remelt the chocolate chips, turning it into a warm, gooey delight that your family will love.
Short on Time?
Cooking doesn’t have to be a marathon, especially on a busy weeknight. Check out our “30-Minute Meals” collection for a wide variety of nutritious, delicious dinners that get you out of the kitchen and back to your family faster. These recipes are tested to be quick, easy, and always family-approved.
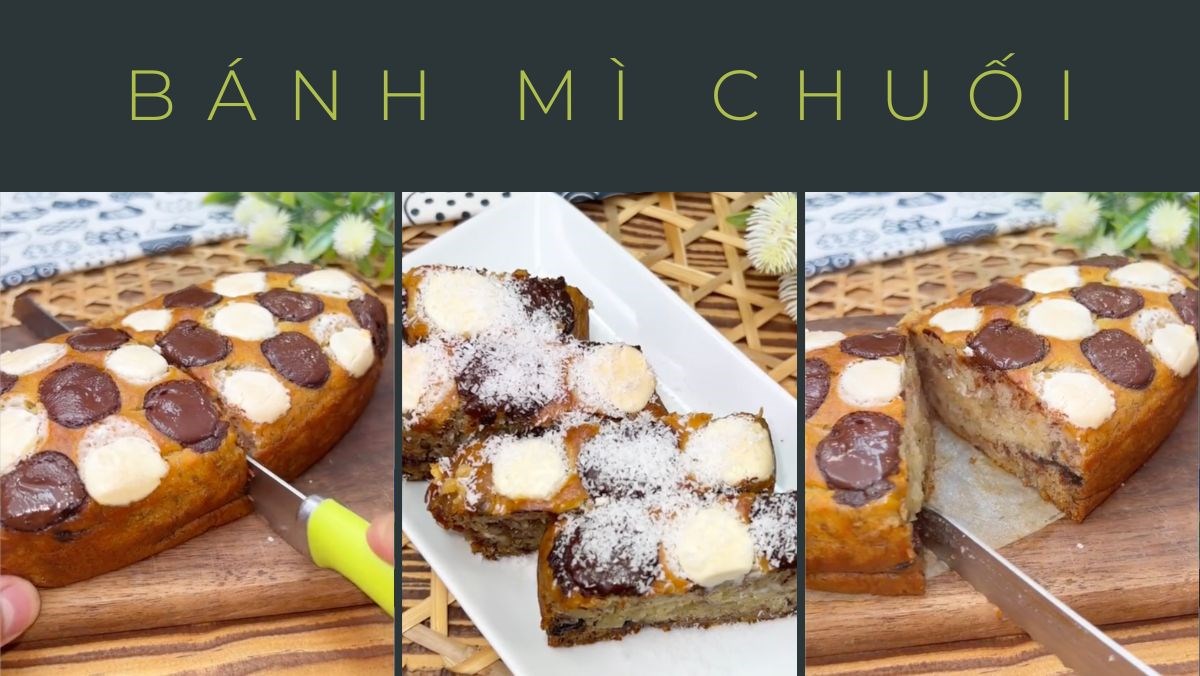
3. 5-Ingredient Viral TikTok Bread
This ultra-simple “one-bowl, dump-and-bake” method went viral for a reason: it’s incredibly quick, easy, and uses pantry-friendly staples. It utilizes melted coconut oil and milk for an unbelievably tender crumb and takes less than 10 minutes to prep. This recipe proves that you don’t need complicated steps to achieve a delicious, moist banana bread that the whole family will love.
Ingredients
- • Bananas: 250g (about 3 medium)
- • Milk: 120ml (1/2 cup – Dairy or Almond)
- • Coconut oil: 100ml (~1/2 cup), melted
- • Egg: 1 large
- • All-purpose flour: 200g (~1 2/3 cups)
- • Baking soda: 15g (~1 tbsp)
- • Sugar: 80g (~1/3 cup)
- • Chocolate: 100g (Chunks or Chips)
Instructions
Mash and Prep
This is a “dump and go” recipe, designed for maximum ease and minimal cleanup, which is why it’s so popular. Start by preheating your oven to 350°F (180°C). Grab a single large mixing bowl. Add the 250g of ripe bananas directly to the bowl and use a fork to mash them thoroughly. You don’t need a separate bowl or fancy equipment; the goal here is speed and simplicity, making it a perfect quick and easy recipe for busy days.

The All-In-One Mix
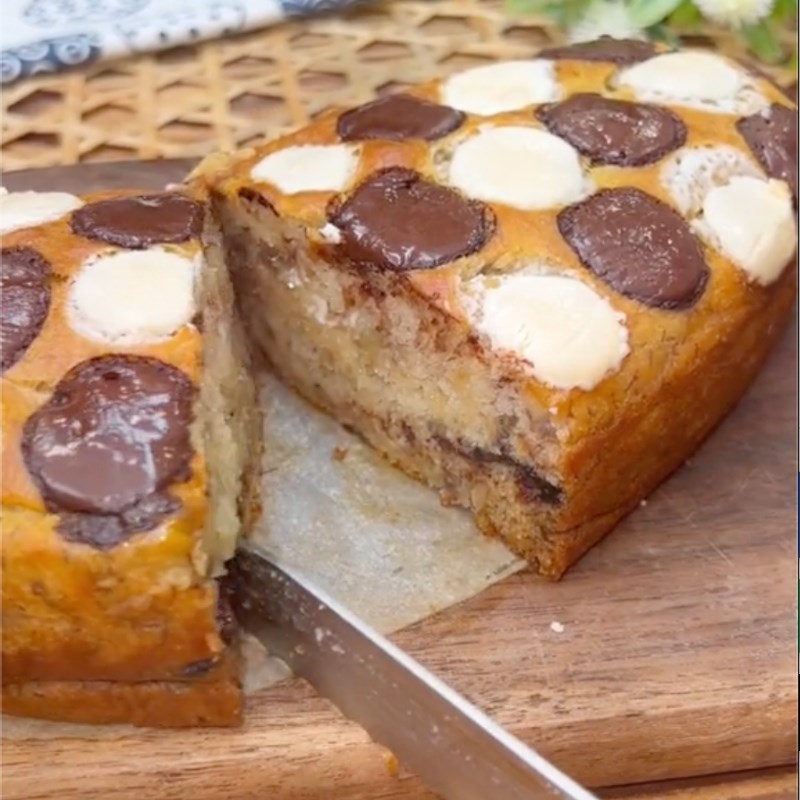
To the same bowl with the mashed bananas, add all the wet ingredients: 1 large egg, 120ml milk, and 100ml of melted coconut oil. Mix these together until just combined. Now, add all the dry ingredients directly on top of the wet mixture: 200g of all-purpose flour, 15g of baking soda, and 80g of sugar. Stir everything together until there are no large dry patches left. Finally, fold in the 100g of chocolate chunks or chips. Using larger chocolate chunks creates irresistible pockets of melted chocolate in the finished bread.


Bake
Pour the finished batter into your prepared loaf pan. Bake at 350°F (180°C) for a duration of 40-45 minutes. This version tends to brown faster than others due to the natural sugars in the milk, so it’s wise to keep a close eye on it, especially after the 30-minute mark. Use the toothpick test to confirm doneness, ensuring a perfectly moist center without overbaking the crust.
Finished Product
The baked bread boasts a wonderfully characteristic aroma that is simply irresistible. The melted coconut oil gives this version a very subtle tropical note that pairs beautifully with the rich chocolate. The crumb is exceptionally tinder, soft, and satisfying. The natural sweetness of the banana is perfectly balanced by the slight bitterness of the chocolate, ensuring that each bite is delicious without being overly sweet. To elevate the experience even further, you can sprinkle some unsweetened shredded coconut on top before serving for added texture and flavor.
🧪 The Science of the Perfect Loaf
Why do some loaves of banana bread turn out dense and gummy while others are perfectly light and fluffy? At dishy.blog, we believe that understanding the “why” behind a recipe empowers you to cook with confidence and troubleshoot any issues. It is all about the science happening in your mixing bowl and oven. From the Maillard reaction that creates that beautiful golden crust to the role of different fats, a little knowledge goes a long way in achieving baking perfection.
- The Sweet Spot (Maillard Reaction): The darker and more spotted your bananas are, the higher their sugar content (specifically fructose). When you bake the bread, this sugar undergoes the Maillard reaction with the amino acids from the proteins in the flour and eggs. This chemical reaction is responsible for creating hundreds of new aroma and flavor compounds, resulting in that deep golden-brown crust and complex, caramelized flavor. Using green or barely-ripe bananas simply will not provide enough free sugar for this magical reaction to occur, leading to a pale and less flavorful loaf.
- Butter vs. Oil: The choice of fat significantly impacts the final texture and flavor. In our recipes above, Recipe 1 uses butter for its rich, dairy flavor and a finer, more cake-like crumb. Recipe 3 uses oil (coconut or vegetable), which creates a sensation of superior moistness because oil remains liquid at room temperature, whereas butter solidifies. If your primary goal is the moistest possible bread that stays soft for days, oil is the undisputed champion. However, for the best, most classic flavor, butter always wins.
📝 Essential Baker’s Tips & FAQ
How to choose delicious bananas
The quality of your bananas is the single most important factor for a great banana bread. Choosing the right ones will ensure a naturally sweet, moist, and flavorful loaf. Don’t be afraid of bananas that look past their prime; for this recipe, the uglier, the better. These tips will help you pick the perfect fruit for your next baking adventure.
- Look for Leopard Spots: The ideal banana for bread is yellow with an abundance of small brown or black dots, resembling a leopard’s coat. These spots are a clear indicator that the starches inside the fruit have converted into simple sugars, making the banana much sweeter and easier to mash.
- The “Black” Banana Myth: While almost-black bananas are incredibly sweet and perfect for baking, there is a point of no return. If the banana peel is split open, leaking fluid, or has a distinctively fermented or alcohol-like smell, it is best to discard it. Using over-fermented bananas will impart a sour, unpleasant taste to your finished bread.
Storage & Freezing (Pantry Friendly)
- Countertop: For optimal freshness, keep the banana bread in an airtight container at room temperature for up to 3 days. We’ve found that the moisture actually redistributes on the second day, making the loaf even softer and more flavorful.
- Freezing: This bread freezes beautifully. Once completely cool, slice the loaf and wrap each slice individually in plastic wrap. Store the wrapped slices in a freezer-safe zip-top bag for up to 3 months. To enjoy, simply microwave a slice for about 30 seconds for an instant, fresh-tasting breakfast treat.

Meet Jack Reynolds, the face, the stomach, and the passionate home cook behind dishy.blog. If you are looking for a Michelin-starred chef with decades of formal culinary training and a fancy restaurant background, you are definitely in the wrong place! Jack is not a professionally trained chef; he is just a regular guy who happens to have a massive, undeniable obsession with good, hearty food and feeding the people he loves.
Born and raised in the heart of Texas, Jack grew up watching his mother and grandmother turn basic pantry staples into absolute magic. However, as he grew older and started working a demanding 9-to-5 corporate job, he realized that most recipe blogs online were either incredibly complicated, required expensive and hard-to-find ingredients, or took hours to prepare. Frustrated by the lack of realistic weeknight meals for busy families, Jack decided to roll up his sleeves, tie on a flour-dusted apron, and start experimenting in his own kitchen.
He began modifying classic Southern comfort foods and traditional American dinner favorites to make them quick, easy, and incredibly pantry-friendly. What started as a small digital diary to keep track of his kitchen triumphs (and a few burnt failures) eventually blossomed into dishy.blog.
Jack’s culinary philosophy is incredibly simple: cooking at home should never be intimidating, complicated, or boring. He truly believes that the fondest memories are made when gathered around a table with a wildly delicious, home-cooked meal. Whether he is perfecting a 20-minute One-Pan Garlic Butter Steak, cracking the code to the crispiest buttermilk fried chicken, or baking a batch of his famous “melt-in-your-mouth” triple-fudge brownies, Jack’s mission is to provide foolproof recipes that anyone can master. Every single recipe on dishy.blog is rigorously tested and family-approved to guarantee flawless results.
When he isn’t busy creating mouth-watering dishes or tweaking his ultimate baked mac and cheese recipe, Jack loves hosting weekend backyard BBQs, exploring local Texas farmers’ markets, and spending time with his wife and two kids—who happily serve as his primary, and toughest, taste testers.