This French toast recipe delivers a timeless breakfast classic, transforming simple bread into a custardy, golden-brown delight perfect for any morning. At dishy.blog, we have meticulously refined this method, ensuring a foolproof and delicious outcome that upholds our promise of creating family-approved meals that are both quick and easy to prepare.
🛠️ The Right Tools Make All the Difference
The Perfect Griddle
Cheap pans cook unevenly, leaving you with burnt spots and soggy centers. A heavy-duty non-stick griddle provides superior heat distribution for that perfect, edge-to-edge golden crust every single time.
The Flexible Spatula
Don’t let your beautiful French toast tear. A thin, flexible fish spatula is the professional’s secret for getting under delicate foods without breaking them, ensuring a perfect flip every time.
Jump to Section:
Craving More Sweet Treats?
If you love the comfort of a warm, sweet breakfast, you need to explore our curated collection of foolproof sweets. From chewy cookies to no-bake cheesecakes, we have something for every sweet tooth. Every recipe is tested to perfection and guaranteed to be a family favorite.
Foolproof French Toast Recipe
This classic french toast recipe has been tested to perfection by the dishy.blog kitchen to guarantee a delicious and impressive breakfast that is surprisingly quick and easy. By using thick-sliced, slightly stale bread, you ensure each piece soaks up the rich, cinnamon-vanilla custard without becoming soggy. The key is cooking over consistent medium heat for about 2-3 minutes per side, which creates a beautifully caramelized, golden-brown crust while keeping the inside tender and fluffy. This method is pantry-friendly and consistently family-approved, making it the ideal choice for a special weekend brunch or a simple weekday treat. It serves as a foundational guide that empowers even beginner cooks to achieve flawless results with confidence.
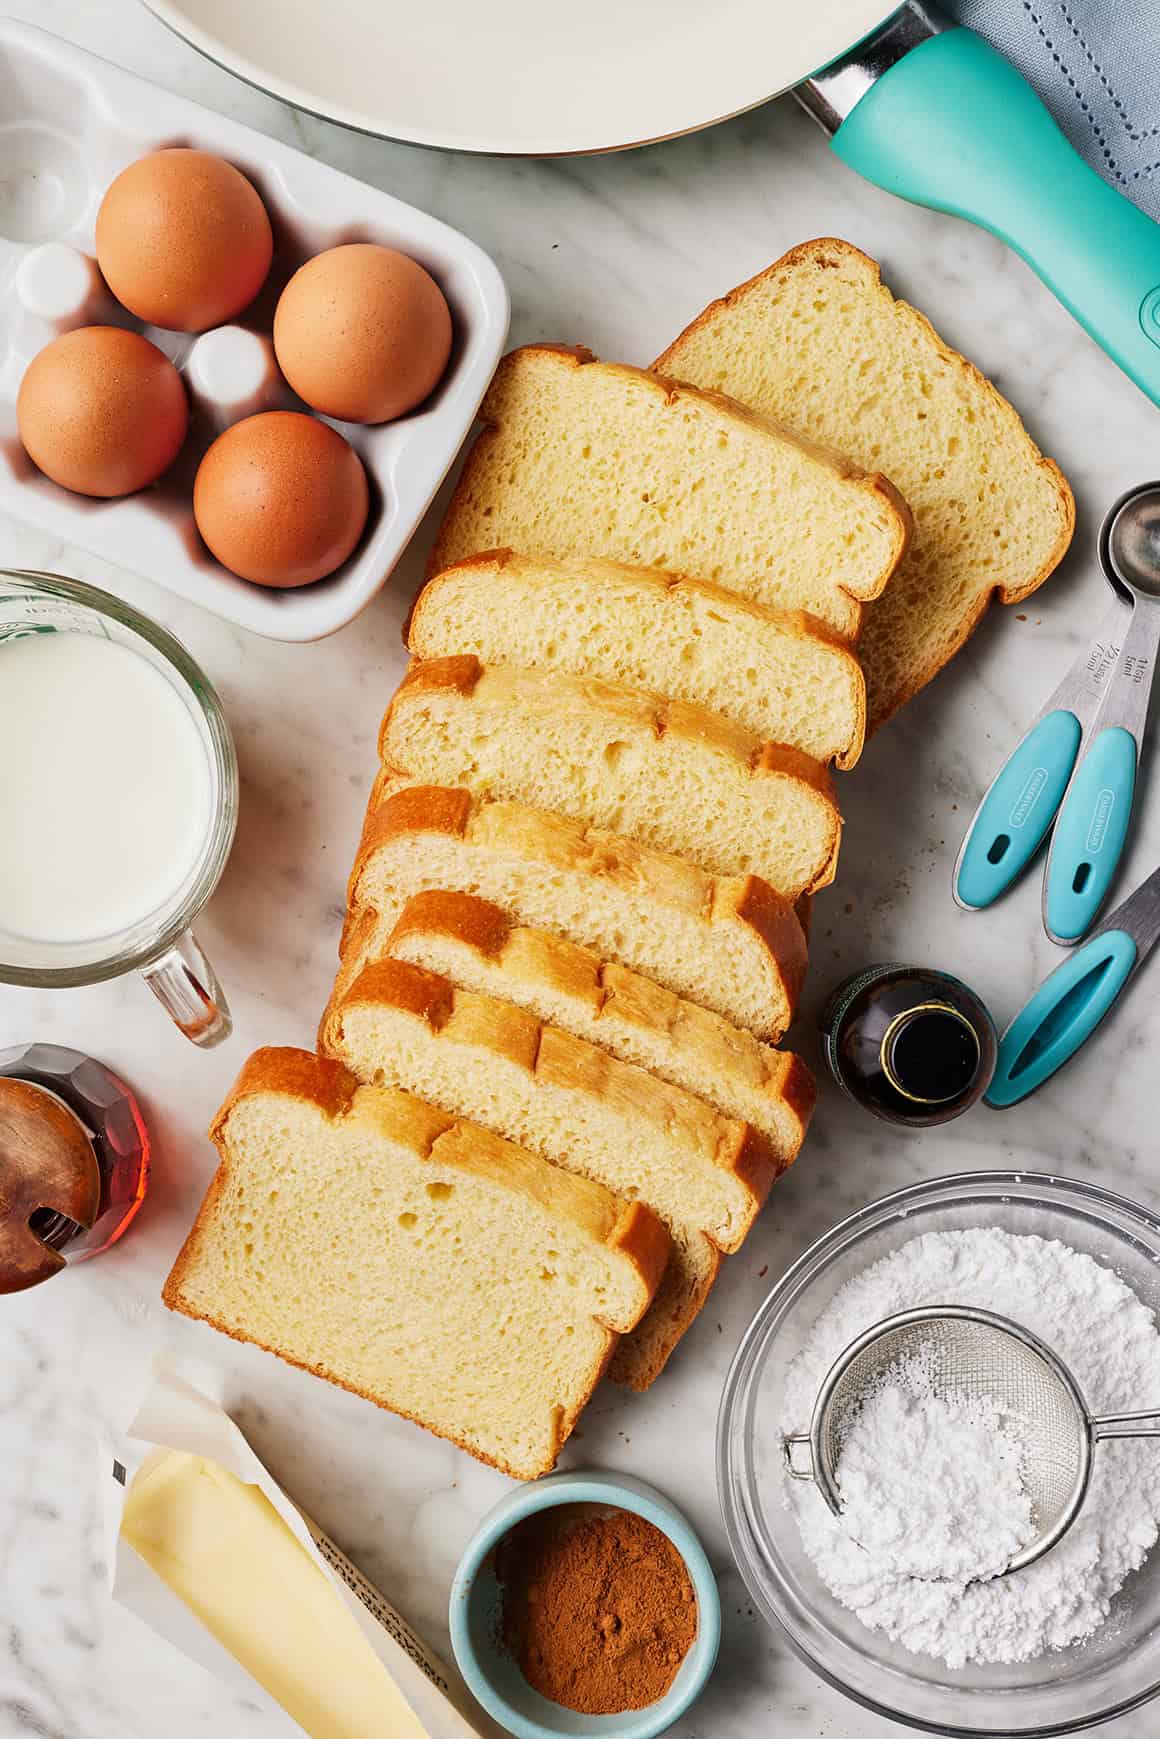
Ingredients
- • Large Eggs: 4 (room temperature)
- • Milk: ⅔ cup (whole milk or a dairy-free option like almond or oat)
- • Vanilla Extract: 1 teaspoon
- • Ground Cinnamon: ½ teaspoon
- • Sea Salt: 1 pinch
- • Thick-Sliced Bread: 8 slices (day-old brioche, challah, or sourdough recommended)
- • Butter or Oil: For the pan
- • Maple Syrup & Powdered Sugar: For serving
Instructions
Prepare the Custard Bath
In a wide, shallow dish, crack the 4 large eggs. A pie plate or a square baking dish works perfectly here, as it provides ample room for dipping the bread slices without making a mess. Whisk the eggs vigorously until the yolks and whites are completely uniform and no streaks remain. This initial whisking is crucial for a smooth, consistent coating. Next, pour in ⅔ cup of milk, 1 teaspoon of vanilla extract, ½ teaspoon of ground cinnamon, and a pinch of sea salt. Continue to whisk until the mixture is homogenous and slightly frothy. The salt may seem minor, but it plays a vital role in balancing the sweetness and amplifying the rich flavors of the egg and vanilla.

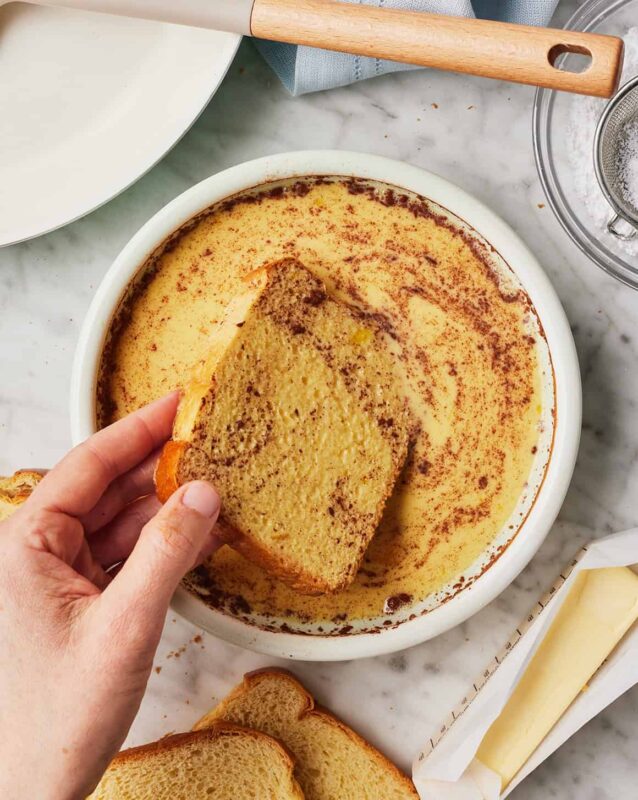
Soak and Sizzle
Heat a large non-stick skillet or griddle over medium heat and add a pat of butter, letting it melt and coat the surface. Working one slice at a time, place a piece of bread into the custard mixture. Let it soak for about 15-20 seconds on each side. The goal is for the bread to be fully saturated but not falling-apart soggy. A gentle press with your fingers will help it absorb the liquid. Lift the slice and allow any excess custard to drip back into the dish before carefully placing it onto the hot skillet. You should hear a satisfying sizzle, which indicates the pan is at the correct temperature to form a beautiful crust. Cook in batches to avoid overcrowding the pan, which lowers the temperature and leads to steaming instead of frying.
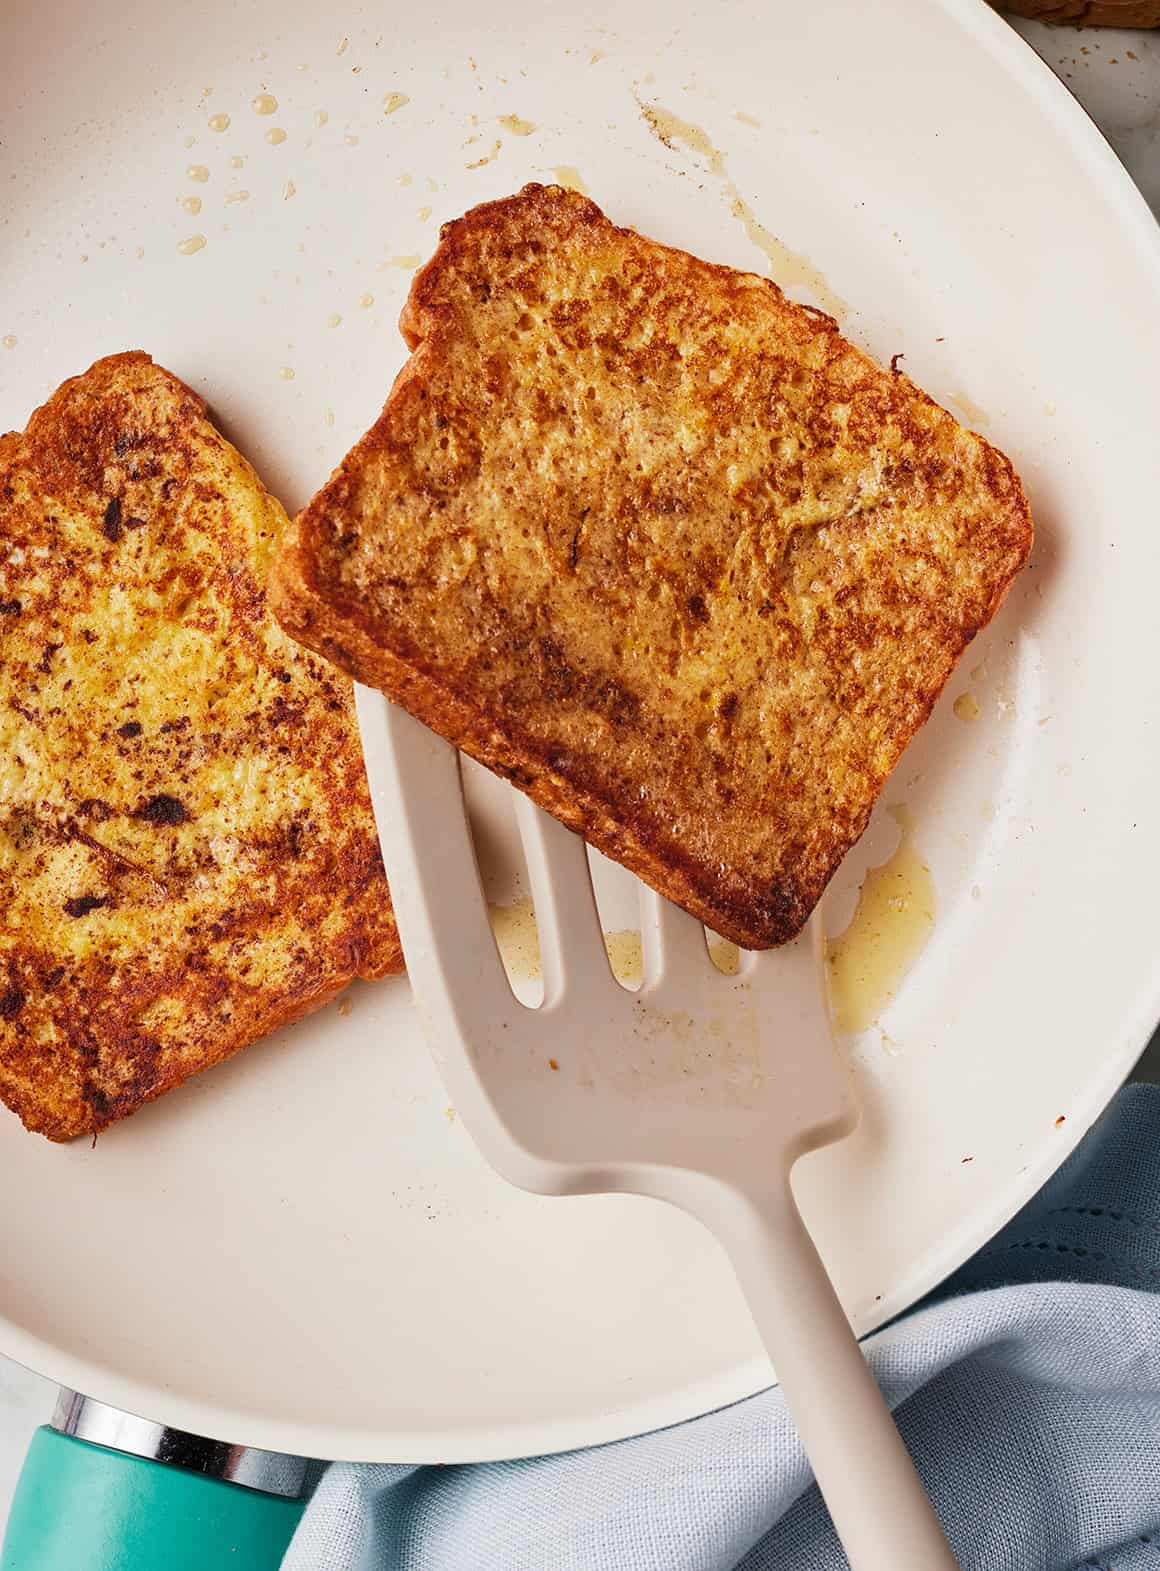
Cook to Golden Perfection
Cook each slice for 2-3 minutes per side. Resist the urge to press down on the bread with your spatula, as this will squeeze out the custard and make it dense. The first side is ready to flip when it is a deep golden brown and lifts easily from the pan. After flipping, cook for another 2-3 minutes. If you find the bread is browning too quickly, reduce the heat to medium-low to ensure the center cooks through without burning the exterior. Keep cooked batches warm on a wire cooling rack set inside a baking sheet in a 200°F (95°C) oven while you finish the remaining slices. This keeps them warm and prevents the bottoms from getting soggy.
Need a Quick Dinner Idea?
Cooking doesn’t have to be a marathon, especially on a busy weeknight. Check out our “30-Minute Meals” collection for a wide variety of nutritious, delicious dinners that get you out of the kitchen and back to your family faster. These recipes are tested to be quick, easy, and always family-approved.
🍞 Choosing the Best Bread for Perfect French Toast
The bread is not just a vehicle for the custard; it is the star of the show. The type of bread you choose will dramatically affect the final texture and flavor of your French toast. The dishy.blog team has tested numerous varieties, and we have found that soft, thick-sliced bread that is slightly stale yields the most superior results. Fresh bread is too soft and absorbent, quickly becoming a soggy mess. The ideal slice should be sturdy enough to handle a good soak in the custard without disintegrating. While many types will work, a few stand out as exceptional choices for creating that perfect balance of a creamy, custardy interior and a crisp, golden-brown exterior.
- Brioche: This is our top choice for a reason. Brioche is an enriched bread made with eggs and butter, which gives it a rich, tender, and almost cake-like crumb. When used for French toast, it becomes incredibly custardy and decadent.
- Challah: Similar to brioche, challah is another enriched bread that is beautifully braided. It is slightly less rich than brioche but has a wonderful texture that soaks up the egg mixture beautifully.
- Sourdough: For a more complex flavor profile, a thick-cut slice of sourdough is an excellent option. Its slight tanginess provides a wonderful contrast to the sweet maple syrup and rich custard.
- French Bread: A good-quality baguette or crusty French loaf, sliced thick, offers a fantastic textural contrast with a chewy crust and soft interior.
🧪 The Science of a Perfect Custard Soak
Why is some French toast divinely custardy while other versions are dry in the middle or, even worse, have a distinct “scrambled egg” layer? The secret lies in the science of the custard. At dishy.blog, we believe understanding the simple chemistry at play will empower you to perfect your technique. The ratio of eggs to milk, the soaking time, and the cooking temperature are all critical variables that determine the final texture. Our tested-to-perfection ratio of 4 eggs to ⅔ cup of milk creates a custard that is rich enough to set up beautifully but fluid enough for the bread to absorb it properly. This ensures a tender, creamy center every time.
- The Egg’s Role: The protein in the egg yolks and whites is what gives French toast its structure. When heated on the griddle, these proteins coagulate, or firm up, creating the custardy texture we all love. Too few eggs result in a soggy, wet piece of bread that never quite sets. Too many, and you risk creating a tough, eggy layer on the outside of your bread.
- The Milk’s Function: Milk serves to thin the egg mixture, allowing the bread to absorb the custard more easily. It also adds moisture and tenderness. The fat in whole milk contributes to a richer final product, but any milk will work. The key is to achieve a balance where the custard is liquid enough to penetrate the bread but concentrated enough to cook through properly.
- The Importance of Soaking Time: Soaking is a delicate balance. A quick dip will only coat the surface, leaving the inside dry and bready. Soaking for too long, especially with fresh bread, will cause it to become overly saturated and fall apart. For thick, day-old bread, 15-20 seconds per side is the sweet spot for maximum absorption without structural collapse.
📝 Essential Tips & FAQ for Flawless Results
Toppings & Serving Suggestions
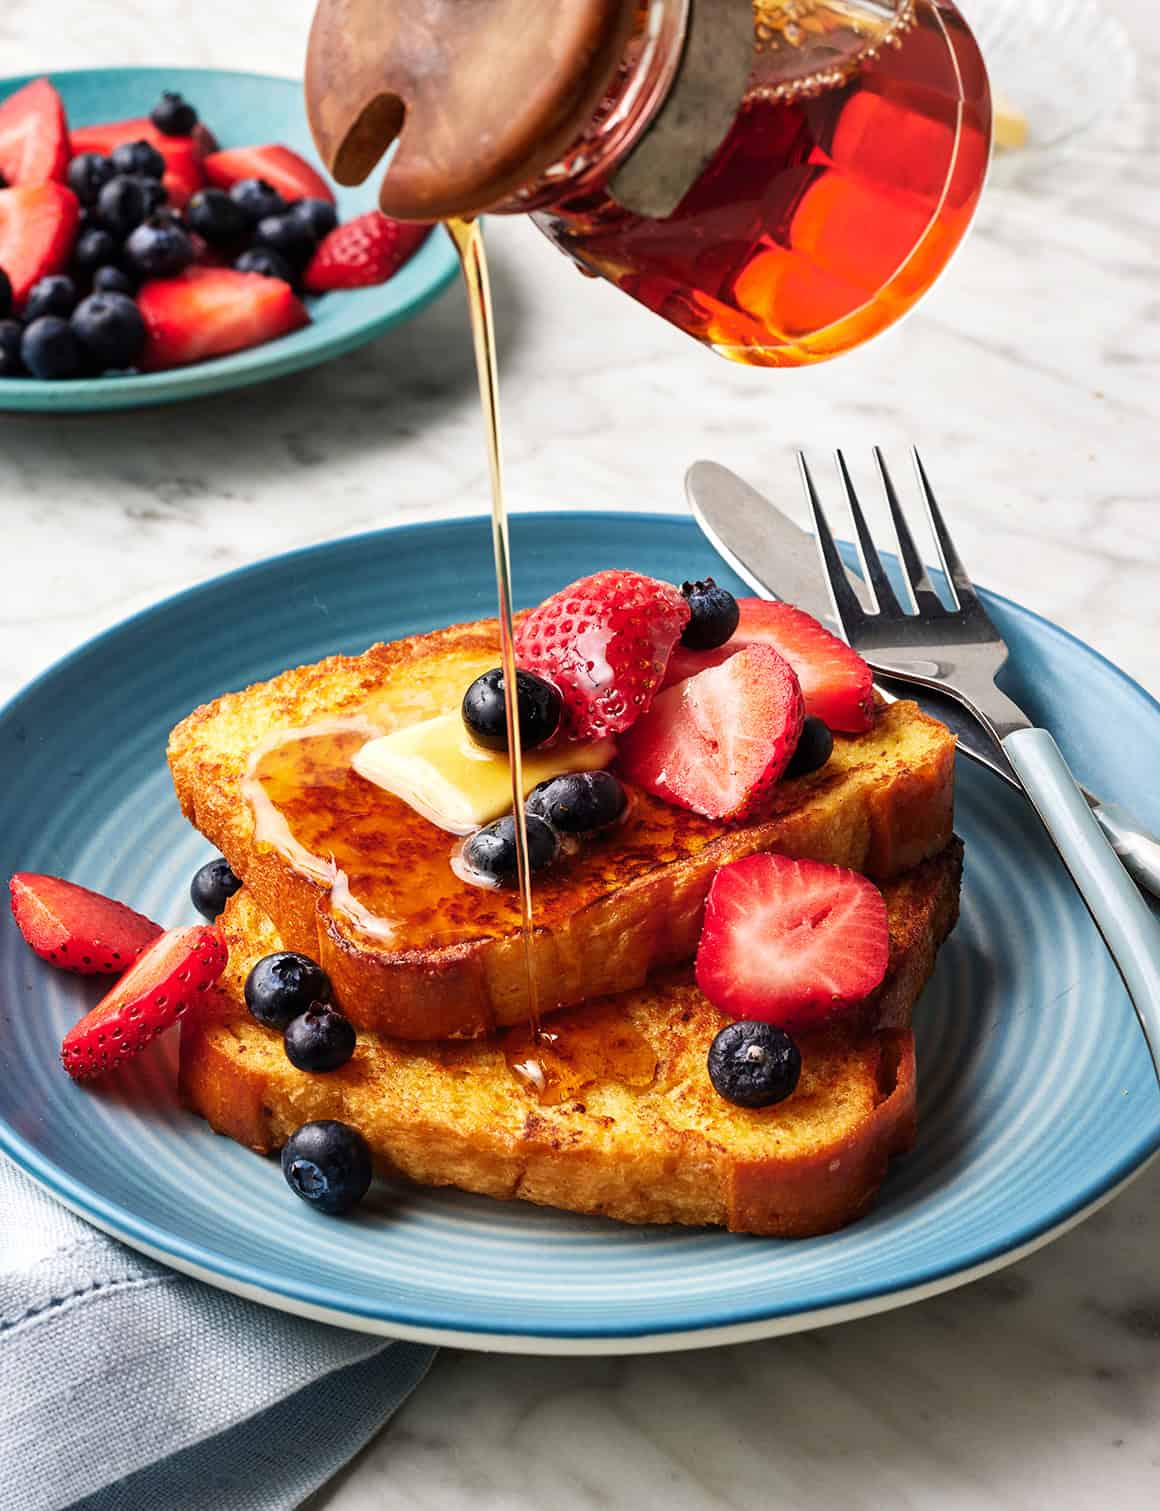
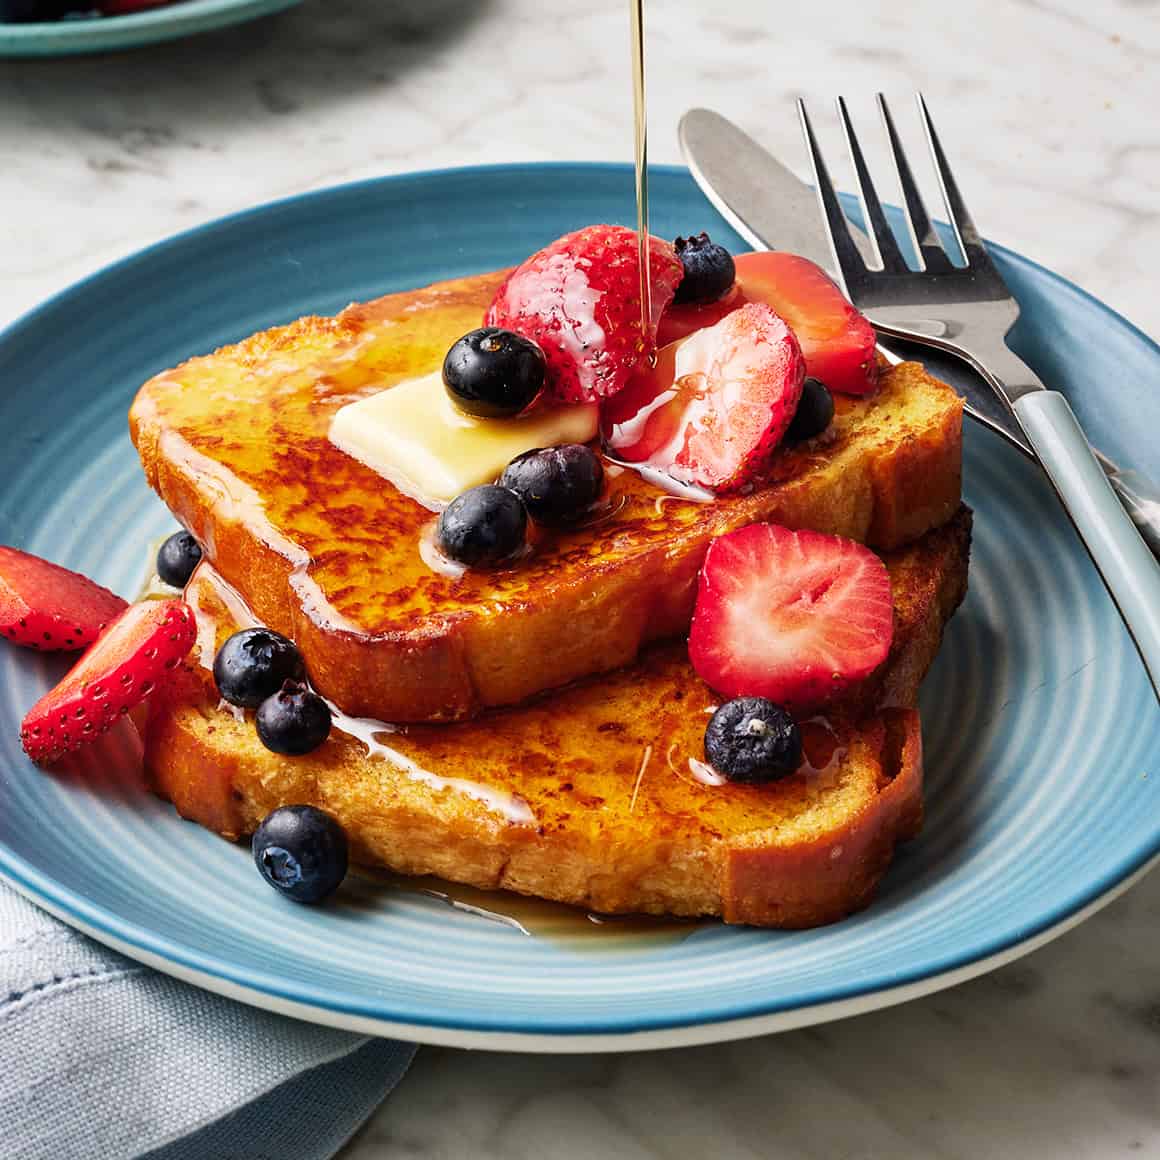
While classic maple syrup is a must, the toppings are where you can truly get creative and turn a simple breakfast into a memorable brunch experience. From fresh fruits to decadent sauces, the possibilities are endless. We encourage you to mix and match based on what is in season and what your family loves. A light dusting of powdered sugar just before serving adds a beautiful, professional finish. For best results, use a fine-mesh duster for an even, delicate coating.
- Fresh Fruit: Sliced strawberries, fresh raspberries, blueberries, or even caramelized bananas add a fresh, vibrant contrast to the rich toast.
- Spreads & Butters: A smear of creamy peanut butter, almond butter, or a dollop of honey butter can add another layer of flavor and richness.
- Sweet Finishes: Beyond maple syrup, try a drizzle of honey, a spoonful of blueberry compote, or even a decadent chocolate-hazelnut spread.
Storage & Freezing (Pantry Friendly)
This French toast recipe is perfect for meal prep, as leftovers store and reheat beautifully, making it a quick and easy breakfast for busy mornings. The key to successful storage is allowing the slices to cool completely to room temperature before packing them away. This prevents steam from getting trapped, which would make them soggy. Proper storage ensures your future breakfast is just as delicious as when it was first made.
- Refrigerator: Store leftover slices in an airtight container in the refrigerator for up to 3 days. To reheat, simply pop them in your toaster or a toaster oven until warmed through and crispy. The microwave also works but will result in a softer texture.
- Freezer: For longer-term storage, French toast freezes exceptionally well. Place the cooled slices on a baking sheet in a single layer and freeze until solid. Then, transfer the frozen slices to a freezer-safe zip-top bag. They will keep for up to 3 months. Reheat directly from frozen in the toaster or microwave.

Meet Jack Reynolds, the face, the stomach, and the passionate home cook behind dishy.blog. If you are looking for a Michelin-starred chef with decades of formal culinary training and a fancy restaurant background, you are definitely in the wrong place! Jack is not a professionally trained chef; he is just a regular guy who happens to have a massive, undeniable obsession with good, hearty food and feeding the people he loves.
Born and raised in the heart of Texas, Jack grew up watching his mother and grandmother turn basic pantry staples into absolute magic. However, as he grew older and started working a demanding 9-to-5 corporate job, he realized that most recipe blogs online were either incredibly complicated, required expensive and hard-to-find ingredients, or took hours to prepare. Frustrated by the lack of realistic weeknight meals for busy families, Jack decided to roll up his sleeves, tie on a flour-dusted apron, and start experimenting in his own kitchen.
He began modifying classic Southern comfort foods and traditional American dinner favorites to make them quick, easy, and incredibly pantry-friendly. What started as a small digital diary to keep track of his kitchen triumphs (and a few burnt failures) eventually blossomed into dishy.blog.
Jack’s culinary philosophy is incredibly simple: cooking at home should never be intimidating, complicated, or boring. He truly believes that the fondest memories are made when gathered around a table with a wildly delicious, home-cooked meal. Whether he is perfecting a 20-minute One-Pan Garlic Butter Steak, cracking the code to the crispiest buttermilk fried chicken, or baking a batch of his famous “melt-in-your-mouth” triple-fudge brownies, Jack’s mission is to provide foolproof recipes that anyone can master. Every single recipe on dishy.blog is rigorously tested and family-approved to guarantee flawless results.
When he isn’t busy creating mouth-watering dishes or tweaking his ultimate baked mac and cheese recipe, Jack loves hosting weekend backyard BBQs, exploring local Texas farmers’ markets, and spending time with his wife and two kids—who happily serve as his primary, and toughest, taste testers.