
This definitive homemade mac and cheese recipe is the ultimate comfort food, featuring bite-sized pasta enveloped in a rich, velvety cheddar sauce and baked to bubbly perfection. At dishy.blog, we have meticulously tested this method to guarantee a smooth, never-grainy sauce that transforms simple pantry staples into a family-approved masterpiece, ready to rival any restaurant side dish.
🛠️ Don’t Let Your Tools Ruin Your Mac
The Anti-Caking Solution
Pre-shredded cheese ruins sauces. A sturdy box grater is the only way to get fresh cheese that melts perfectly without grainy additives.
The Forever Skillet
For a seamless stovetop-to-oven transition, this enameled cast iron skillet provides even heat retention for the perfect bubbly crust.
Jump to Recipe:
Craving More Comfort Food?
If this cheesy masterpiece warms your soul, you absolutely need to explore our “Classic American Comfort Food” collection. From fluffy mashed potatoes to slow-roasted meats, we have curated the ultimate list of heartwarming dishes. Every single recipe is rigorously tested to ensure it brings joy to your family table.
1. The Ultimate Baked Mac and Cheese
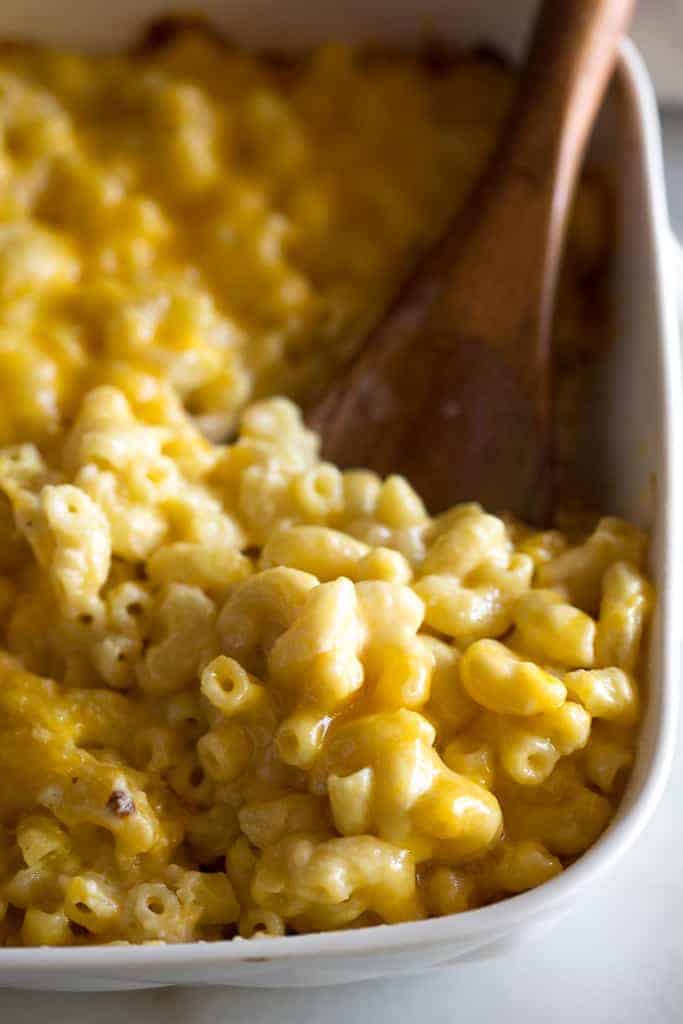
This is the gold standard of macaroni and cheese recipes, designed for those who appreciate a classic roux-based sauce and a golden, baked finish. The dishy.blog kitchen team has balanced the ratio of milk, cream, and sharp cheddar to ensure the pasta stays moist even after baking. It is a foolproof method that delivers a sophisticated yet kid-friendly dinner, perfect for holidays or a cozy weeknight meal.
Ingredients
- • Elbow Macaroni: 225g (1/2 lb), uncooked
- • Salted Butter: 43g (3 tbsp)
- • All-Purpose Flour: 16g (2 tbsp)
- • Salt: 1/2 tsp (adjust if using unsalted butter)
- • Ground Black Pepper: 1/8 tsp
- • Whole Milk: 360ml (1 1/2 cups)
- • Half and Half: 180ml (3/4 cup)
- • Sharp Cheddar Cheese: 250g (2 1/2 cups), freshly shredded
Instructions
Prepare the Oven and Pasta
Begin by preheating your oven to 325°F (165°C). This gentle temperature ensures the cheese melts evenly without separating or becoming oily. Lightly grease an 8-inch square baking dish or a similarly sized casserole dish with butter or non-stick spray. Bring a large pot of salted water to a rolling boil. Add the 225g of elbow macaroni and cook until it is al dente, or slightly undercooked by about 1 minute compared to the package instructions. The pasta will continue to cook in the oven, absorbing the savory cheese sauce, so avoiding mushy noodles at this stage is critical.
Drain the pasta well in a High-Flow Colander to remove excess starch water, then set it aside.
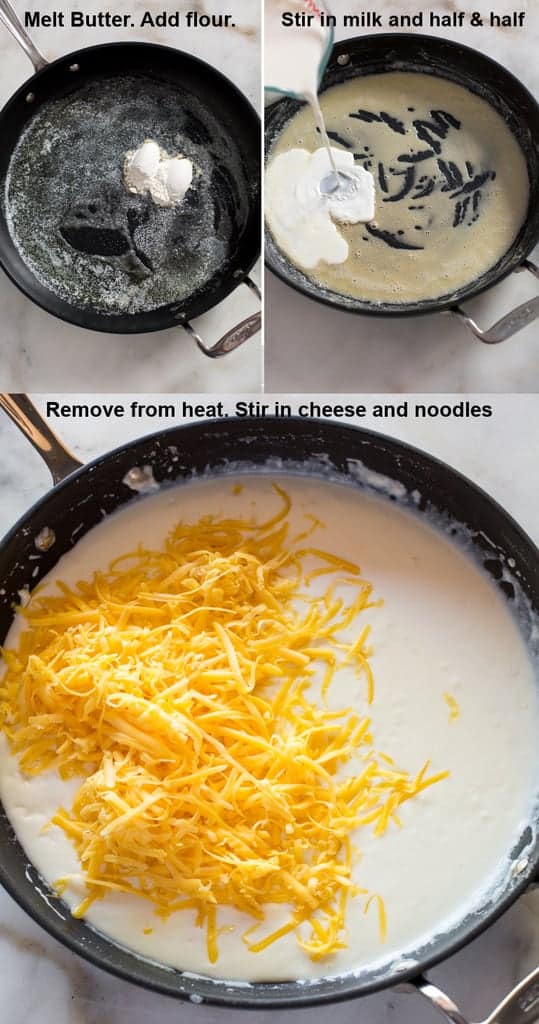
Create the Roux Base
The foundation of a creamy sauce is a proper roux. In a medium saucepan or skillet, melt the 43g of butter over medium heat. Once the butter is bubbling but not browning, sprinkle in the 16g of flour, 1/2 tsp salt, and 1/8 tsp black pepper. Whisk constantly for exactly 2 minutes. This cooking time is essential to cook out the raw flour taste, creating a nutty, savory base. Do not let the flour burn; it should just turn a pale golden color.
Using a Silicone Balloon Whisk ensures you can scrape the corners of the pan effectively without scratching your cookware, guaranteeing a lump-free base.
Build the Béchamel and Melt Cheese
Reduce the heat to medium-low. Slowly pour in the 360ml of milk and 180ml of half and half while whisking vigorously and continuously. Adding the liquid slowly helps prevent lumps from forming. Cook this mixture, stirring constantly, until it bubbles gently and thickens to the consistency of warm gravy, which usually takes about 5-7 minutes. You will know it is ready when it coats the back of a spoon.
Remove the saucepan from the heat entirely. This is a crucial step to prevent the sauce from breaking. Add 1 cup of your freshly shredded cheddar cheese and stir gently until it is completely melted and smooth. This creates a luxurious Mornay sauce that serves as the heart of your dish.
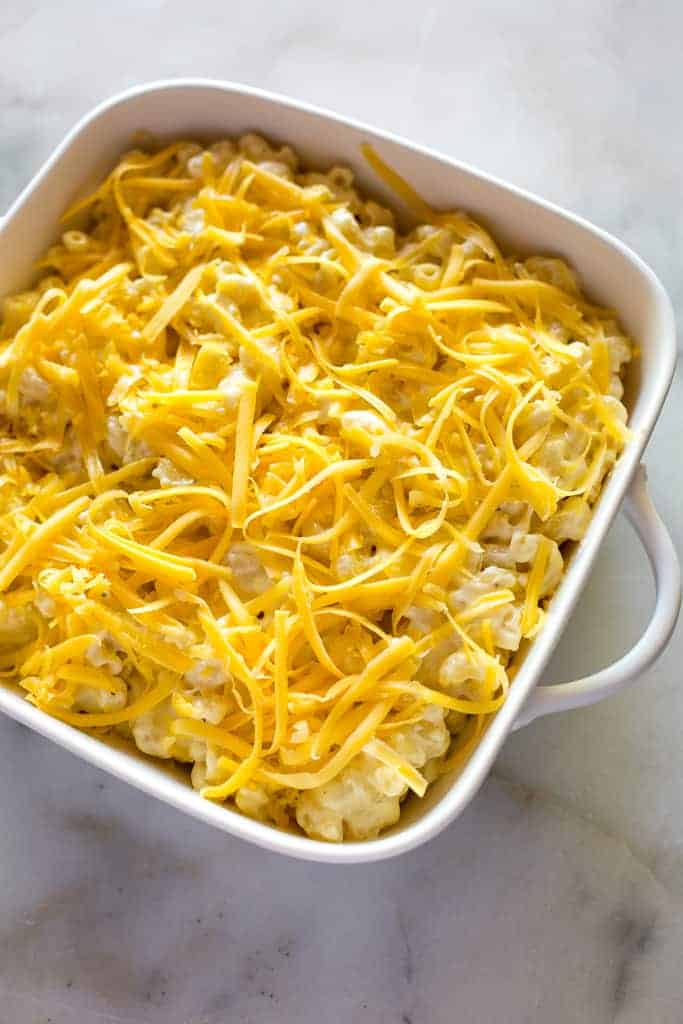
Combine and Bake
Add the cooked, drained macaroni to the cheese sauce and toss until every noodle is generously coated in the golden liquid. Pour half of this pasta mixture into your prepared baking dish. Sprinkle 1/2 cup of the remaining shredded cheese over this layer. Pour the remaining pasta on top, and finish by sprinkling the final portion of cheese over the surface. This layering technique ensures cheesy goodness in every single bite, not just on top.
Bake in the preheated oven for 15-20 minutes. You are looking for the cheese on top to be fully melted and bubbly, and for the edges to be slightly golden. Do not overbake, or the sauce may dry out. Remove from the oven and let it rest for 5 minutes before serving to allow the sauce to set slightly.
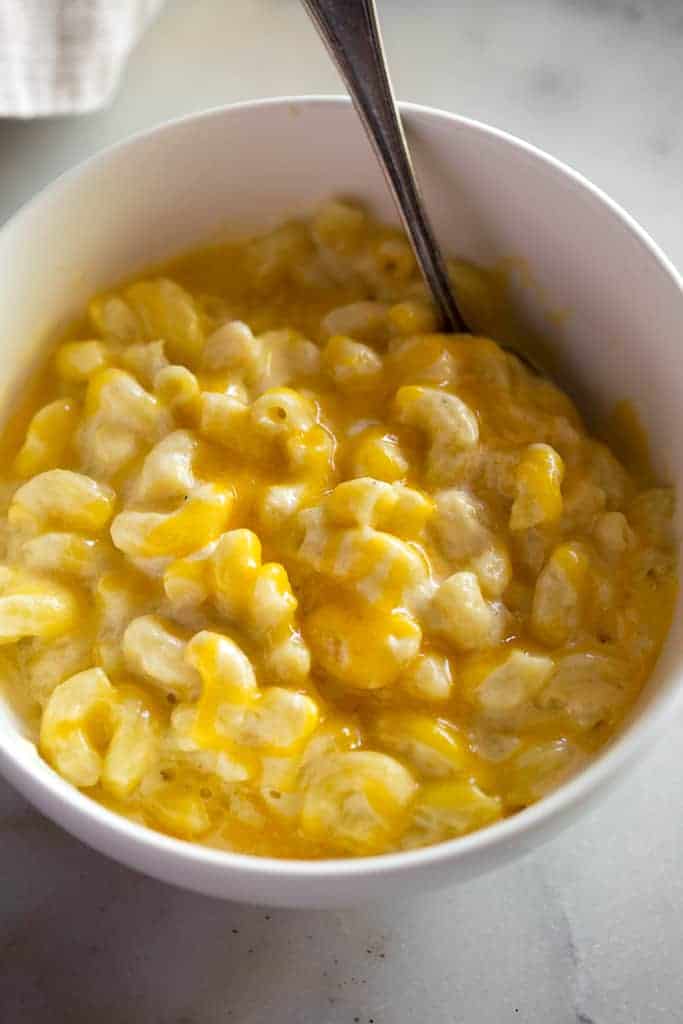
2. Quick & Creamy Stovetop Version
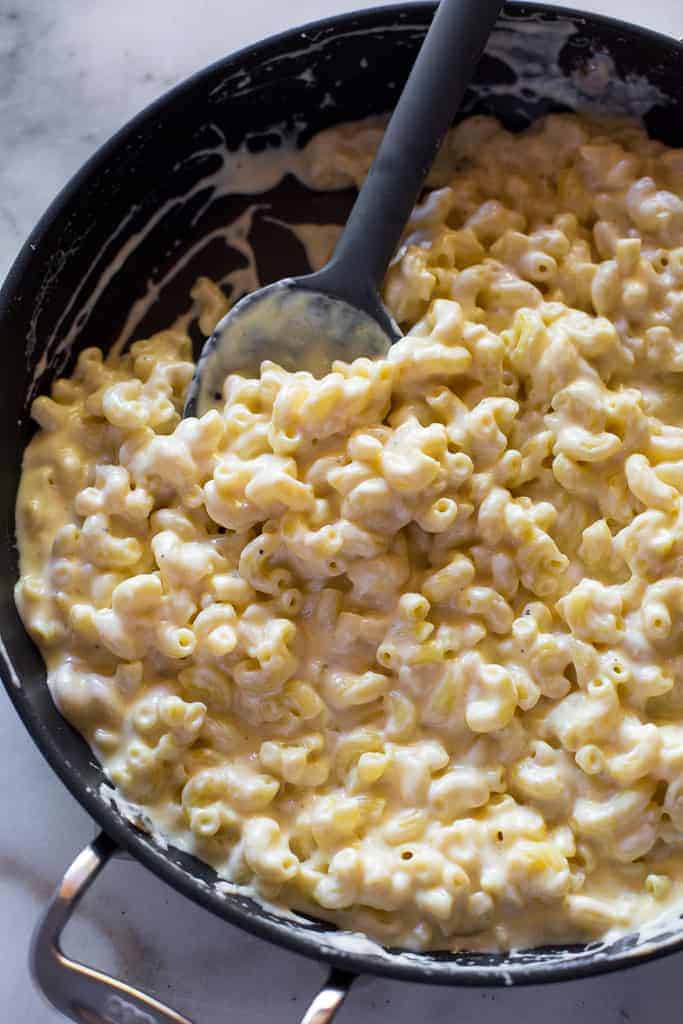
Sometimes you need comfort food immediately, and turning on the oven feels like too much effort. This stovetop variation is the definition of “Quick & Easy” cooking. It follows the exact same principles as the baked version but skips the final oven step, resulting in a creamier, saucier dish that is ready to eat the moment the cheese melts. It mimics the texture of premium boxed mac and cheese but with wholesome, real ingredients.
Ingredients
- • Same ingredients as the Classic Baked Recipe above.
- • Modification: You may reduce the milk by 1/4 cup if you prefer a thicker sauce since it won’t reduce in the oven.
Instructions
Cook and Sauce
Follow the instructions for the Classic Baked Recipe through Step 3. Boil your pasta to al dente and prepare the cheese sauce in a large pot or deep skillet. Once you have melted the initial 1 cup of cheese into the sauce, do not remove it from the heat entirely; instead, keep it on the lowest possible setting to maintain warmth.
Finish and Serve
Add the drained pasta to the sauce. Instead of reserving cheese for topping, stir the remaining 1 1/2 cups of shredded cheddar directly into the pot. Stir gently and continuously until all the cheese is melted and the noodles are coated in a thick, glossy blanket of cheese. Taste and adjust seasoning with extra salt or pepper if needed. Serve immediately while hot and gooey.
Need Dinner on the Table Fast?
We know how hectic weeknights can be. That’s why we’ve compiled our favorite “30-Minute Meals” that don’t compromise on flavor. From stir-frys to quick pastas, these recipes are designed to save you time without sacrificing the homemade taste your family loves.
3. Gourmet Bacon & Breadcrumb Mac
If you are looking to elevate your mac and cheese for a dinner party or simply want a more textual experience, this variation is for you. We take the classic base and enhance it with the smoky salinity of crispy bacon and a crunchy, buttery breadcrumb topping. This textural contrast between the creamy pasta and the crispy topping is what makes this version a “Melt In Your Mouth” favorite at dishy.blog.
Ingredients
- • Base: Classic Baked Recipe ingredients (from Recipe 1).
- • Bacon: 5 strips, cooked until crispy and crumbled.
- • Topping: 1 cup Panko breadcrumbs.
- • Topping Butter: 3 tbsp unsalted butter, melted.
- • Optional: 1/4 cup Parmesan cheese for the topping.
Instructions
Prepare the Add-ins
Cook the bacon until it is very crispy. Drain it on paper towels to remove excess grease, then chop it into fine bits. Prepare the breadcrumb topping by mixing 1 cup of Panko breadcrumbs with 3 tablespoons of melted butter in a small bowl. Stir until the mixture resembles wet sand. If you are using Parmesan cheese, mix it in now for an extra savory kick.
To get perfectly evenly cooked bacon without the mess, consider baking it on a Rimmed Baking Sheet with a wire rack.
Assemble and Texture
Prepare the mac and cheese as described in Recipe 1. Just before pouring the mixture into the baking dish, fold the crumbled bacon bits directly into the pot with the cheesy pasta. This infuses a smoky flavor throughout the entire dish. Pour the mixture into the baking dish. Instead of just a cheese topping, spread the buttery breadcrumb mixture evenly over the surface. The Panko will brown significantly better than regular breadcrumbs, providing a superior crunch.
Bake to Golden Brown
Bake at 325°F (165°C) for 20 minutes. Keep a close eye on the topping during the last 5 minutes. You want the breadcrumbs to turn a deep golden brown. If the pasta is bubbly but the topping is still pale, switch your oven to “Broil” for 1-2 minutes, watching it constantly to prevent burning. Serve immediately to enjoy the contrast of the crispy top and creamy interior.
🧪 The Science of a Smooth Cheese Sauce
Why does some homemade mac and cheese turn out grainy or oily? At dishy.blog, we believe understanding the chemistry of cooking helps you avoid these common pitfalls. The secret lies in the emulsion of proteins, fats, and water.
- The Role of Starch (The Roux): The flour in the roux acts as an emulsifying agent. When the starch granules swell and burst in the milk, they create a lattice that traps fat droplets and water molecules, preventing them from separating. Without enough starch (or if the roux isn’t cooked properly), the fat from the cheese will pool out, creating an oily slick on top of your dish.
- The Cheese Melting Point: Aged cheddar is delicious, but as cheese ages, its protein structure breaks down, making it more prone to separating into oil and clumps when heated. This is why we recommend using a block of medium or sharp cheddar rather than extra-sharp for the best melt. Furthermore, pre-shredded cheese contains anti-caking agents like cellulose. These agents physically block the cheese proteins from fusing together, guaranteeing a gritty texture. Grating your own cheese removes this variable entirely.
📝 Essential Cook’s Tips & FAQ
Choosing the Best Cheese
While cheddar is classic, the best mac and cheese often comes from a blend. A good melting cheese has a high moisture-to-protein ratio. Cheddar provides the iconic sharp flavor. Gruyère adds nuttiness and superior melting qualities. Monterey Jack is mild but melts incredibly well. Cream Cheese can be whisked into the sauce for added tang and stability. Avoid hard, dry cheeses like aged Parmesan as the primary cheese, as they do not melt into a creamy sauce easily.
Freezing & Reheating (Pantry Friendly)
- Freezing: This recipe is freezer-friendly! Prepare the dish up to the point of baking (Step 4 in Recipe 1), but do not bake it. Let it cool completely, then cover tightly with plastic wrap and aluminum foil. Freeze for up to 3 months.
- Baking from Frozen: When you are ready to eat, bake the frozen dish covered with foil at 350°F (175°C) for 60-70 minutes. Remove the foil for the last 10 minutes to brown the cheese. This makes it an excellent meal prep option for busy weeks.

Meet Jack Reynolds, the face, the stomach, and the passionate home cook behind dishy.blog. If you are looking for a Michelin-starred chef with decades of formal culinary training and a fancy restaurant background, you are definitely in the wrong place! Jack is not a professionally trained chef; he is just a regular guy who happens to have a massive, undeniable obsession with good, hearty food and feeding the people he loves.
Born and raised in the heart of Texas, Jack grew up watching his mother and grandmother turn basic pantry staples into absolute magic. However, as he grew older and started working a demanding 9-to-5 corporate job, he realized that most recipe blogs online were either incredibly complicated, required expensive and hard-to-find ingredients, or took hours to prepare. Frustrated by the lack of realistic weeknight meals for busy families, Jack decided to roll up his sleeves, tie on a flour-dusted apron, and start experimenting in his own kitchen.
He began modifying classic Southern comfort foods and traditional American dinner favorites to make them quick, easy, and incredibly pantry-friendly. What started as a small digital diary to keep track of his kitchen triumphs (and a few burnt failures) eventually blossomed into dishy.blog.
Jack’s culinary philosophy is incredibly simple: cooking at home should never be intimidating, complicated, or boring. He truly believes that the fondest memories are made when gathered around a table with a wildly delicious, home-cooked meal. Whether he is perfecting a 20-minute One-Pan Garlic Butter Steak, cracking the code to the crispiest buttermilk fried chicken, or baking a batch of his famous “melt-in-your-mouth” triple-fudge brownies, Jack’s mission is to provide foolproof recipes that anyone can master. Every single recipe on dishy.blog is rigorously tested and family-approved to guarantee flawless results.
When he isn’t busy creating mouth-watering dishes or tweaking his ultimate baked mac and cheese recipe, Jack loves hosting weekend backyard BBQs, exploring local Texas farmers’ markets, and spending time with his wife and two kids—who happily serve as his primary, and toughest, taste testers.