
This homemade chili recipe delivers a perfectly balanced, rich, and hearty bowl of comfort that is destined to become your family’s new favorite. At dishy.blog, our kitchen team has rigorously tested this one-pot wonder to ensure it is not only incredibly flavorful but also quick, easy, and made with pantry-friendly ingredients for a foolproof weeknight dinner.
🛠️ Essential Tools For Flawless Chili
The Perfect Chili Pot
Forget thin pots that scorch your chili. This best-selling Enameled Cast Iron Dutch Oven provides incredibly even heat distribution, which is essential for browning the beef and simmering the chili to perfection without any hot spots.
The Ground Beef Smasher
Stop struggling to break up ground beef with a wooden spoon. This simple yet brilliant Meat Masher Tool makes quick work of the task, ensuring your beef has a uniform, fine texture that incorporates perfectly into the chili base.
Jump to Section:
Need Dinner Ready in a Flash?
If you love the convenience of this one-pot chili, you’ll be thrilled with our collection of 30-minute meals. These recipes are designed for busy weeknights, offering maximum flavor with minimal effort. Every dish is tested to perfection and guaranteed to be a family favorite.
Why This Will Be Your Go-To Chili Recipe
This homemade chili recipe is designed to be the definitive classic for the modern home cook, delivering a deeply satisfying and complex flavor profile without complicated steps. We understand that the best recipes are ones you can rely on, which is why the dishy.blog kitchen team has tested this method over a dozen times, making slight adjustments to ensure it is absolutely foolproof. This recipe perfectly embodies our core brand values. It is **Pantry Friendly**, utilizing canned goods and common spices you likely already have on hand. It is **Quick & Easy**, requiring just one pot and about 25 minutes of active cooking time, making it an ideal solution for a busy weeknight. Most importantly, it is **Family Approved**, with a rich, savory flavor that is hearty but not overwhelmingly spicy, making it a hit with both adults and children. We’ve built this recipe on a foundation of classic chili-making techniques to guarantee a delicious outcome every time you make it.
Key Ingredients For The Perfect Chili
The secret to a truly memorable chili lies in using a balanced combination of quality ingredients. This recipe leverages a trio of tomato products to build a rich, complex base, while a specific blend of spices creates that signature chili warmth. At dishy.blog, we believe that understanding each component empowers you to cook with confidence and even make smart substitutions when needed. Below, we break down the key players in this family-approved recipe, explaining why each one is crucial for achieving that perfect, hearty bowl of comfort. These ingredients are all readily available and pantry-friendly, ensuring you can whip up this dish whenever the craving strikes.

The Foundation: Meats and Beans
The heart and soul of any classic American chili is the combination of ground meat and beans, providing both substance and a wonderful textural contrast. We opt for lean ground beef (90/10 is ideal) as it provides a rich, beefy flavor without releasing excessive grease, which can make the final dish feel heavy. This means less time skimming fat and more time enjoying the cooking process. For the beans, this recipe calls for a duo of red kidney beans and pinto beans. Kidney beans are a classic choice, holding their shape well during the long simmer and offering a firm, meaty texture. Pinto beans complement them perfectly by being slightly creamier, helping to naturally thicken the chili as they cook. This combination is a core part of our **Tested to Perfection** promise, ensuring a balanced and satisfying chili every single time.
The Flavor Base: Aromatics and Spices
Building a deep flavor profile starts with a solid foundation of aromatics and a carefully selected blend of spices. This recipe begins by sautéing onion and bell pepper to soften them and release their natural sweetness, a crucial first step that adds layers of flavor right from the start. We use three types of tomato products—paste, sauce, and diced—to create a chili base that is rich, tangy, and has body. The tomato paste provides a concentrated, umami-rich depth, the sauce adds smoothness, and the diced tomatoes contribute a fresh, bright character. The spice blend is the true star: a generous amount of chili powder provides the classic flavor, while extra ground cumin adds an earthy, smoky undertone. A touch of cayenne pepper offers a gentle warmth that can be easily adjusted to your family’s preference. This precise combination is what makes the recipe reliably delicious and a standout in the world of comfort food.
Step-by-Step Chili Recipe Instructions
This is the ultimate one-pot chili recipe, meticulously tested by the dishy.blog kitchen team to be completely foolproof. We’ve broken down the process into simple, manageable steps that guarantee a rich, hearty, and flavorful result in just over an hour. From blooming the spices to achieve maximum aromatic depth to the final simmer that marries all the flavors, this guide will walk you through creating a family-approved meal that tastes like it has been cooking all day. Follow these instructions closely for a perfect bowl of comfort every time.

Ingredients
- • Olive Oil: 2 tablespoons
- • Large Onion: 1, chopped
- • Bell Pepper (Green or Red): 1, chopped
- • Garlic Cloves: 4, minced
- • Ground Beef (90/10 lean): 1 pound (450g)
- • Tomato Paste: 1 tablespoon
- • Chili Powder: 3 tablespoons
- • Ground Cumin: 1 tablespoon
- • Dried Oregano: 1 ½ teaspoons
- • Salt: 1 teaspoon
- • Cayenne Pepper: ¼ teaspoon
- • Ground Black Pepper: ½ teaspoon
- • Diced Tomatoes: 1 (14.5-ounce) can
- • Tomato Sauce: 1 (8-ounce) can
- • Red Kidney Beans: 1 (16-ounce) can, rinsed
- • Pinto Beans: 1 (16-ounce) can, rinsed
- • Beef Broth: 2 cups (480mL)
Instructions
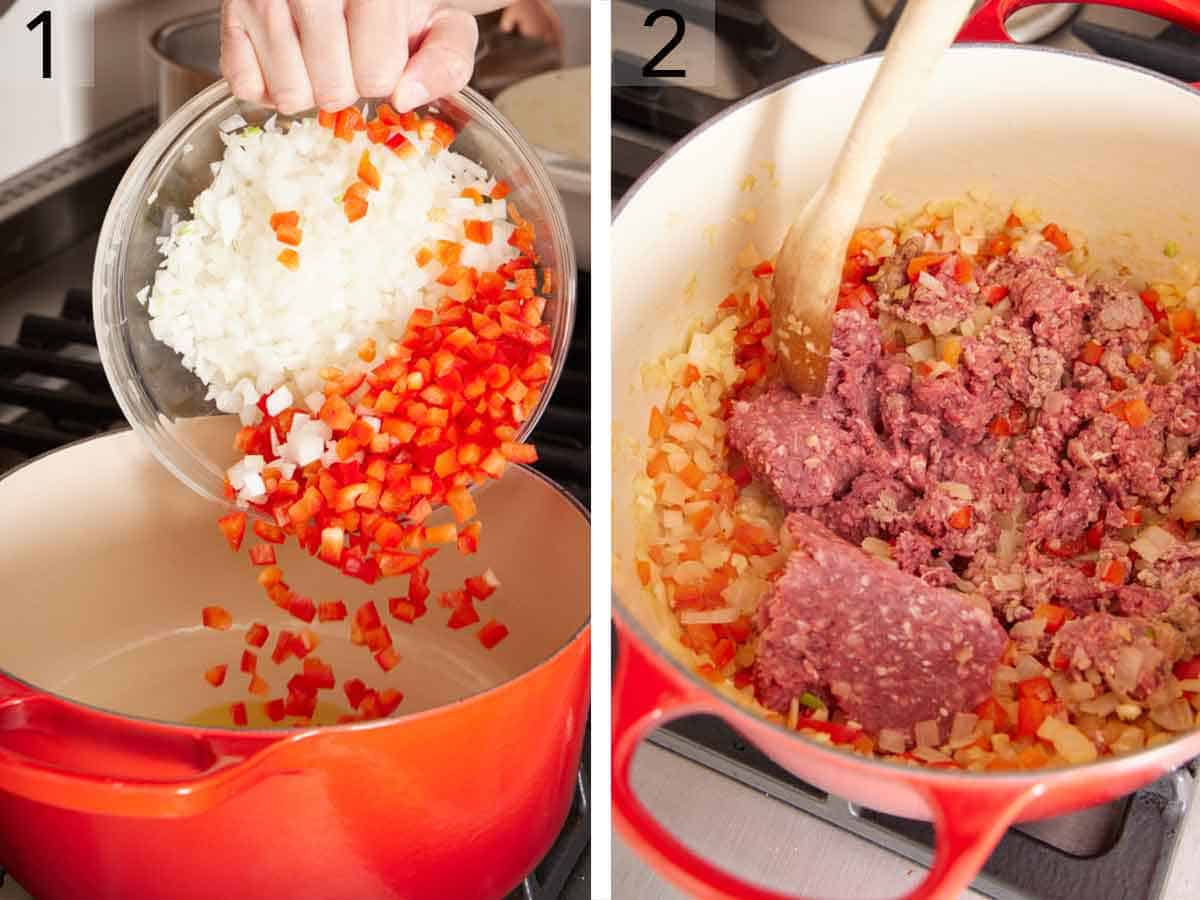
Sauté Aromatics & Brown the Beef
First, heat 2 tablespoons of olive oil in a large Dutch oven or heavy-bottomed pot over medium-high heat. Add the chopped onion and bell pepper, cooking and stirring frequently for about 5 minutes, or until they have softened and the onion becomes translucent. This initial step builds the first layer of flavor. Add the 4 minced garlic cloves and continue to cook for just one more minute until fragrant. Next, add 1 pound of ground beef to the pot. Using a wooden spoon or a meat masher, break the beef into small pieces as it cooks. Continue cooking for about 5 minutes, or until the beef is no longer pink. A crucial tool for this step is a high-quality heat-resistant meat chopper, which breaks up the meat much more efficiently than a spoon for a perfect chili texture.
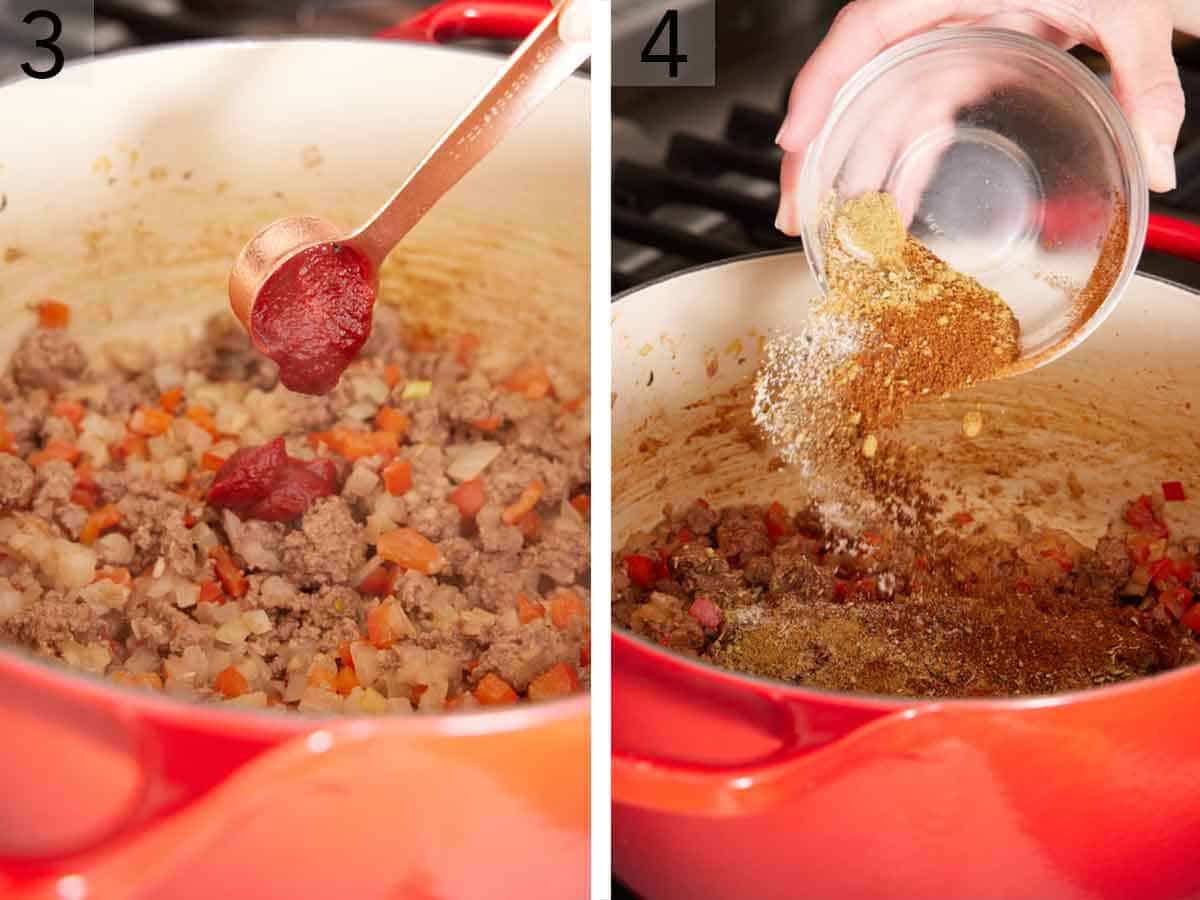
Bloom the Spices
Reduce the heat to medium. Add 1 tablespoon of tomato paste to the pot and stir it into the beef and vegetables, cooking for 1 minute. This step caramelizes the paste, removing its raw taste and adding a deep, umami-rich flavor. Now, add the “holy trinity” of chili spices: 3 tablespoons of chili powder, 1 tablespoon of ground cumin, and ¼ teaspoon of cayenne pepper, along with the dried oregano, salt, and black pepper. Continue to cook, stirring constantly, for another minute. This process, known as “blooming,” toasts the spices in the hot fat, which unlocks their essential oils and intensifies their aromatic flavors, making your chili noticeably more fragrant and delicious. For the most vibrant flavor, ensure your spices are fresh; a high-quality, fragrant Ancho Chili Powder can elevate your dish from good to great.
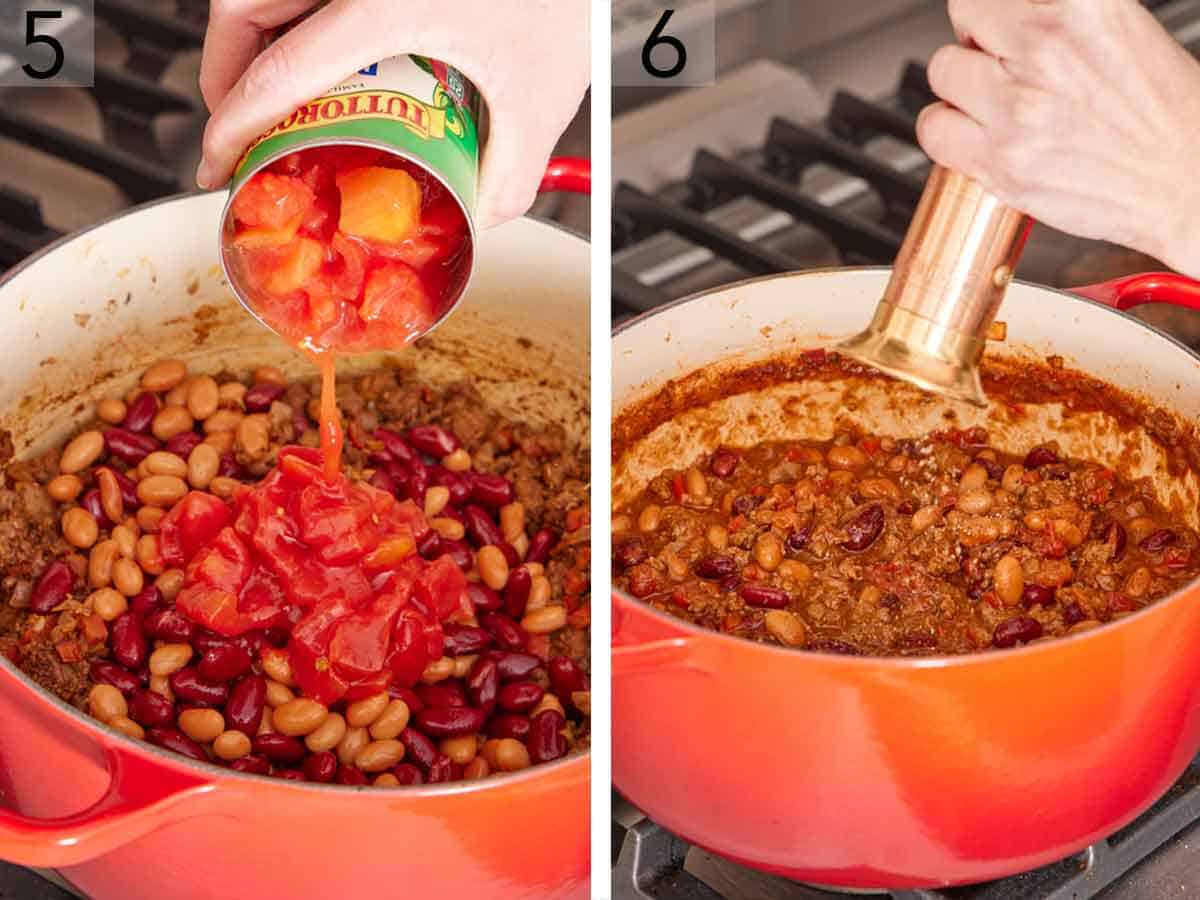
Combine and Simmer
Pour in the 2 cups of beef broth and use your spoon to scrape any browned bits from the bottom of the pot. These bits, known as “fond,” are packed with concentrated flavor. Next, stir in the can of diced tomatoes, the can of tomato sauce, and the rinsed and drained kidney and pinto beans. A reliable and smooth-operating can opener is a small but mighty tool that makes this part of the process much faster and safer. Bring the entire mixture to a lively simmer over medium-high heat. Once it begins to bubble, reduce the heat to medium-low to maintain a gentle, steady simmer. This slow cooking process is where all the individual ingredients meld together into a cohesive, flavorful stew.
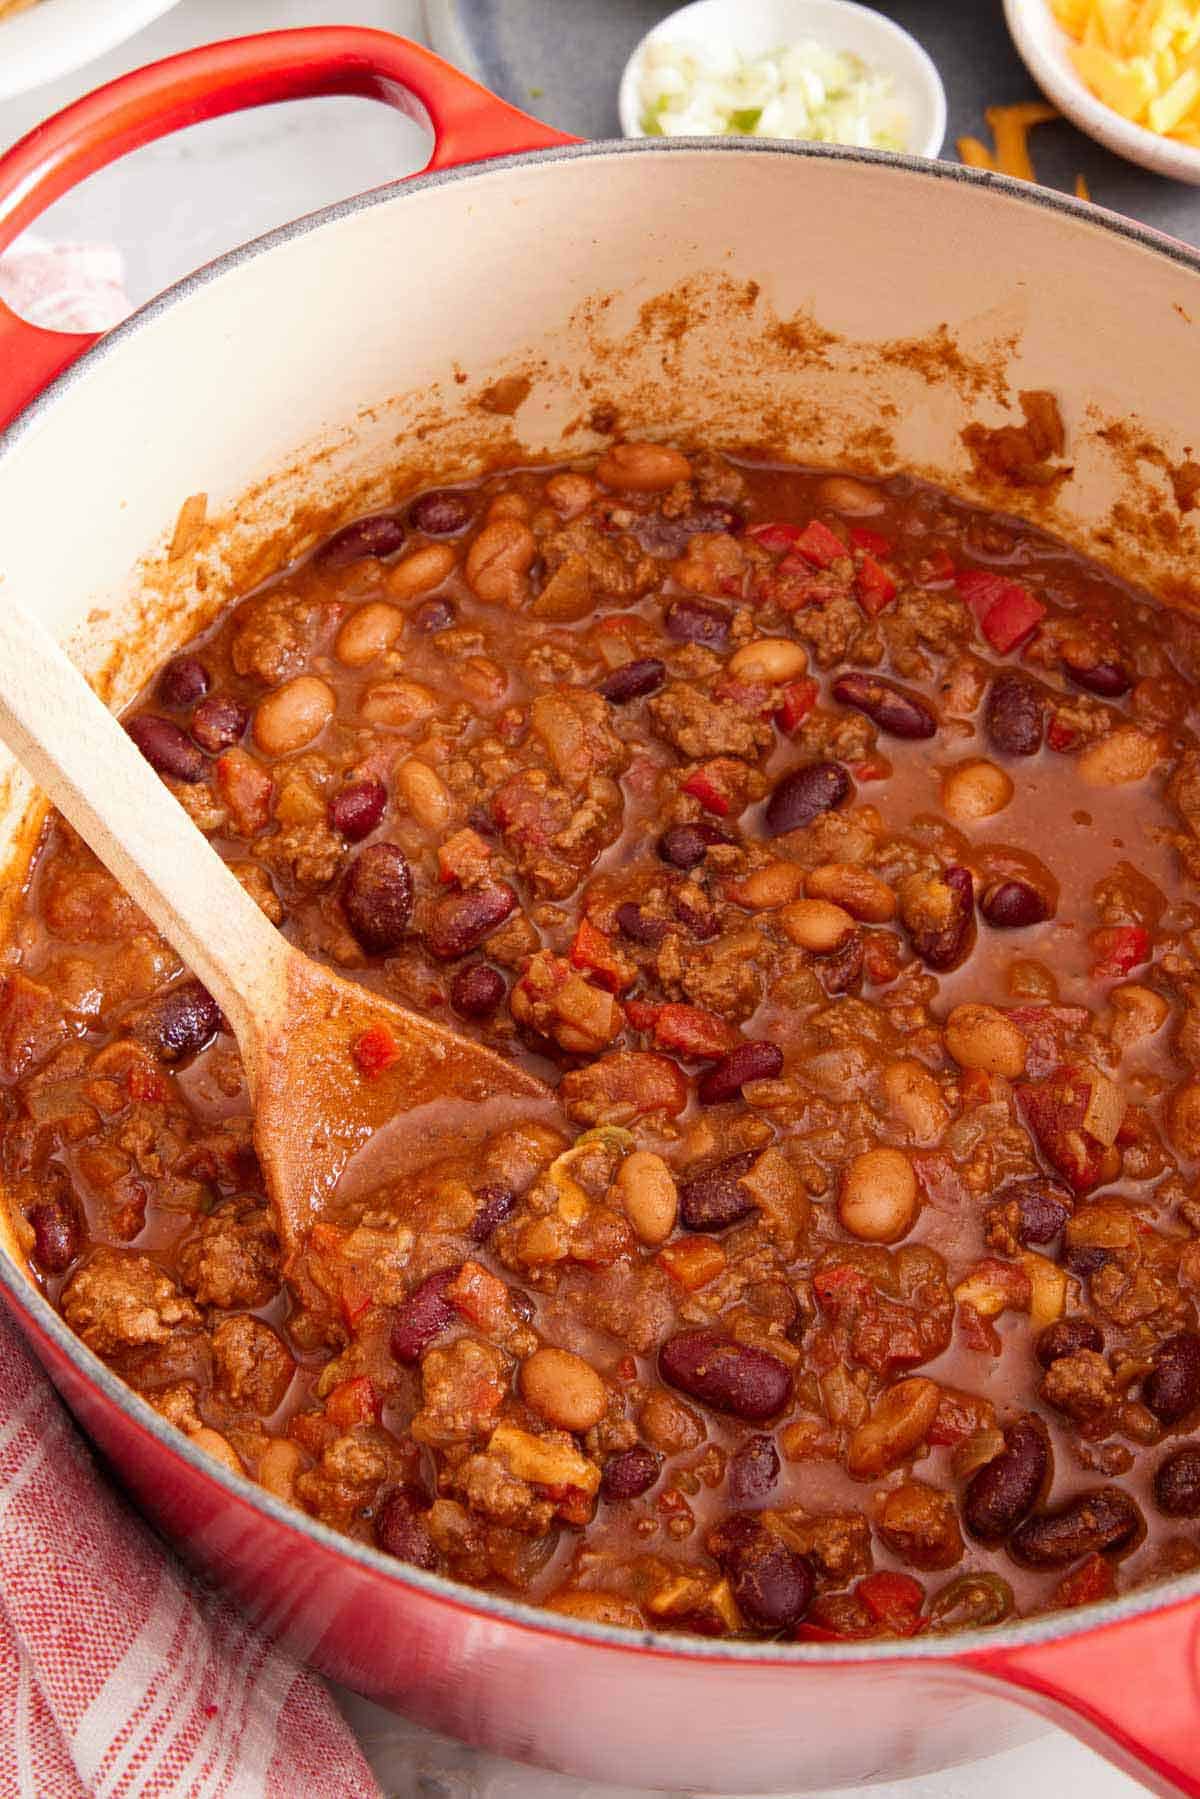
Thicken and Serve
Let the chili simmer, uncovered, for 25 to 30 minutes, stirring occasionally. Simmering uncovered is essential as it allows excess liquid to evaporate, which naturally thickens the chili to the perfect consistency. After simmering, give it a final taste and season with additional salt and pepper if needed. Serve the chili hot, ladling it into bowls using a sturdy stainless steel ladle. Garnish with your favorite toppings like shredded cheddar cheese, a dollop of sour cream, crushed tortilla chips, and sliced green onions. This dish is even better the next day, making it a fantastic option for meal prep. Store leftovers in high-quality airtight glass containers to keep them fresh for up to 5 days.
Master the Grill This Season
Chili is a year-round comfort food, but when the weather is warm, nothing beats firing up the grill. Elevate your outdoor cooking game with our collection of BBQ & Grilling recipes. From perfectly marinated steaks to juicy grilled chicken, we have everything you need to become the undisputed grill master of your neighborhood.
🧪 The Science of Deep Chili Flavor
Creating a truly exceptional chili goes beyond just following a list of ingredients; it involves understanding the simple science that transforms those ingredients into a complex, deeply flavorful stew. At dishy.blog, we believe that when you know the “why” behind the “how,” you become a more confident and intuitive cook. Key chemical reactions like the Maillard reaction and the process of blooming spices are what separate a good chili from a great one. These techniques don’t require special skills, just a little knowledge about how heat and ingredients interact. Mastering these fundamentals will elevate not only your chili but all of your cooking, allowing you to build incredible layers of flavor in any dish you create. These scientific principles are the foundation of our **Tested to Perfection** philosophy, ensuring you get delicious results every time.
Discover the Best of American Cooking
This chili recipe is a perfect example of classic American comfort food. If you love hearty, satisfying dishes that feel like a warm hug, you must explore our extensive collection of American classics. From mac and cheese to meatloaf, these are the family-approved recipes you’ll turn to again and again.
📝 Essential Tips, Variations, & FAQ
The perfect bowl of chili is a personal masterpiece, and while our base recipe is tested to be foolproof, there is always room for customization. From adjusting the heat level to experimenting with different toppings, these tips and answers to frequently asked questions will help you tailor the chili to your exact preferences. Whether you want to make it ahead of time, store leftovers, or try a new variation, this section provides all the expert advice you need. We’ve compiled these suggestions based on dozens of tests in the dishy.blog kitchen to ensure your chili-making experience is a resounding success.

Pro Tips for Making This Recipe
These professional tips from our kitchen team will help you elevate your chili and streamline the process. A little extra attention to detail can make a big difference in the final flavor and texture. For example, creating a self-serve chili bar is a fantastic way to cater to different tastes when serving a crowd, making your meal an interactive and memorable experience.
- • Create a Topping Bar: When serving a crowd, set up a buffet-style topping bar. Keep the chili warm in a Slow Cooker on the “low” or “warm” setting. Arrange bowls with shredded cheddar, sour cream, diced onions, jalapeños, and crushed tortilla chips so everyone can customize their own bowl.
- • Better The Next Day: Like many stews, chili’s flavor deepens and improves overnight. The ingredients have more time to meld together. For the best possible flavor, consider making it a day ahead of time, letting it cool completely, and then reheating it gently on the stove before serving.
- • How To Thicken Chili: If your chili is too thin for your liking, the easiest method is to let it simmer uncovered for a bit longer to allow more liquid to evaporate. For a quicker fix, you can create a slurry by mixing one tablespoon of cornstarch with two tablespoons of cold water, then stirring it into the simmering chili until it thickens.
Storage & Freezing (Pantry Friendly)
- • Refrigerating: Transfer any leftover chili to an airtight container and store it in the refrigerator for up to 5 days. The chili will thicken as it cools. To reheat, simply warm it in a saucepan over medium-low heat, adding a splash of beef broth or water to loosen it to your desired consistency.
- • Freezing: Chili is one of the best freezer meals. Allow it to cool completely before transferring it to freezer-safe containers or bags. Be sure to leave about a half-inch of headspace to allow for expansion. It will keep well in the freezer for up to 3 months. To serve, thaw it overnight in the refrigerator and reheat gently on the stove.
Frequently Asked Questions
Here are answers to some of the most common questions about making homemade chili. From substitutions to different cooking methods, these answers will help you tackle any challenge and ensure your chili is a success.
- • Can I use a different type of meat? Absolutely. This recipe works wonderfully with ground turkey or ground chicken for a leaner option. You can even use a combination, like half ground beef and half ground pork, for a different flavor profile.
- • Can I make this chili in a slow cooker? Yes, this recipe adapts perfectly to a slow cooker. Simply follow steps 1 and 2 on the stovetop to brown the beef and bloom the spices. Then, transfer everything to your slow cooker, add the remaining ingredients, and cook on low for 6-8 hours or on high for 3-4 hours.
- • What can I serve with chili? Chili is incredibly versatile. Classic pairings include a side of fluffy cornbread or crusty garlic bread for dipping. It is also fantastic served over baked potatoes, french fries, or nachos. For a complete family-approved meal, a simple side salad is a great addition. Don’t forget a set of deep, sturdy soup bowls to hold all those delicious toppings.

Meet Jack Reynolds, the face, the stomach, and the passionate home cook behind dishy.blog. If you are looking for a Michelin-starred chef with decades of formal culinary training and a fancy restaurant background, you are definitely in the wrong place! Jack is not a professionally trained chef; he is just a regular guy who happens to have a massive, undeniable obsession with good, hearty food and feeding the people he loves.
Born and raised in the heart of Texas, Jack grew up watching his mother and grandmother turn basic pantry staples into absolute magic. However, as he grew older and started working a demanding 9-to-5 corporate job, he realized that most recipe blogs online were either incredibly complicated, required expensive and hard-to-find ingredients, or took hours to prepare. Frustrated by the lack of realistic weeknight meals for busy families, Jack decided to roll up his sleeves, tie on a flour-dusted apron, and start experimenting in his own kitchen.
He began modifying classic Southern comfort foods and traditional American dinner favorites to make them quick, easy, and incredibly pantry-friendly. What started as a small digital diary to keep track of his kitchen triumphs (and a few burnt failures) eventually blossomed into dishy.blog.
Jack’s culinary philosophy is incredibly simple: cooking at home should never be intimidating, complicated, or boring. He truly believes that the fondest memories are made when gathered around a table with a wildly delicious, home-cooked meal. Whether he is perfecting a 20-minute One-Pan Garlic Butter Steak, cracking the code to the crispiest buttermilk fried chicken, or baking a batch of his famous “melt-in-your-mouth” triple-fudge brownies, Jack’s mission is to provide foolproof recipes that anyone can master. Every single recipe on dishy.blog is rigorously tested and family-approved to guarantee flawless results.
When he isn’t busy creating mouth-watering dishes or tweaking his ultimate baked mac and cheese recipe, Jack loves hosting weekend backyard BBQs, exploring local Texas farmers’ markets, and spending time with his wife and two kids—who happily serve as his primary, and toughest, taste testers.